


Using a high-powered cleaning device can indeed tackle those annoying cobweb formations. In my years testing various models, I’ve found that the right settings can make a significant difference in efficiency. For instance, a device operating at around 2000 PSI with a suitable nozzle can blast away these nuisances with minimal effort.
Adjusting the spray angle is crucial. A wide fan pattern can dislodge larger strands, while a narrow jet is perfect for precision work in tight corners. I recall a time when I tackled a particularly stubborn corner of my garage. Switching to a 15-degree nozzle made all the difference, allowing me to clear away even the most entrenched silk strands.

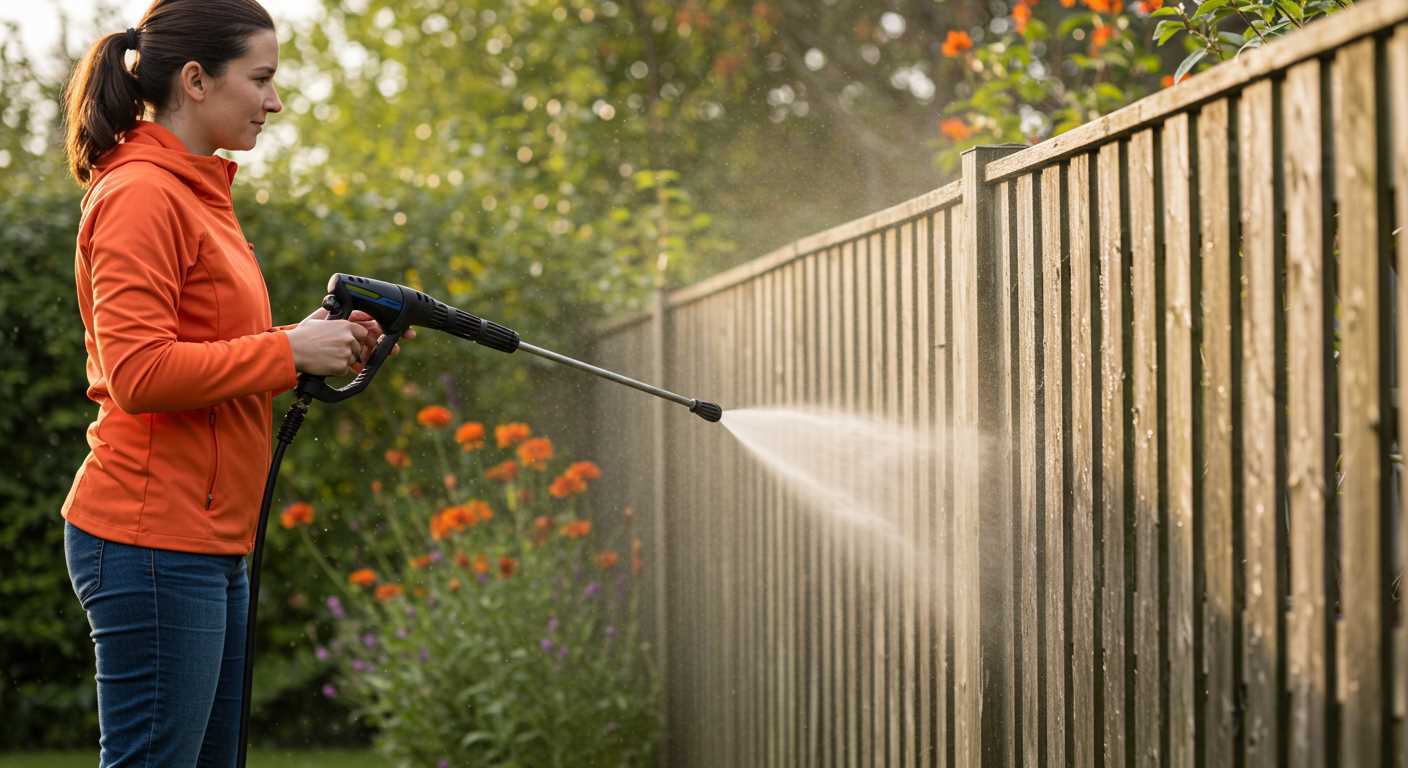
Another tip is to aim for the right distance. Standing too close can cause damage to surfaces, while being too far may not be effective. A distance of about 2-3 feet usually strikes the right balance, ensuring a thorough clean without risking harm to your property.
Lastly, after clearing those pesky formations, consider using a suitable protective spray on surfaces to deter future inhabitants. This simple step can save you time and effort in the long run. With the right approach and tools, tackling cobwebs can become a quick and painless task.
Effectiveness of High-Pressure Equipment in Clearing Cobwebs
Using high-powered cleaning devices can indeed aid in eliminating those unwanted silk structures from various surfaces. My experience has shown that the force generated can dislodge these nuisances effectively, especially when targeting nooks and crannies where they tend to accumulate.
Here are some insights based on my testing:
- Distance Matters: Maintaining an appropriate distance from the surface is key. Too close, and you risk damaging surfaces; too far, and the force may not be sufficient.
- Angle of Attack: Adjusting the nozzle to an optimal angle helps in maximizing the force directed at the strands. A narrow jet tends to work best for precision cleaning.
- Surface Type: Different materials react uniquely. For instance, wood may splinter if not approached carefully, while concrete can handle a more aggressive approach.
- Pre-Wet the Area: Spraying the area lightly before using the equipment can help loosen the silk structures, making removal easier.
In my hands-on trials, I found that even budget-friendly models can perform adequately for this task. If you’re considering a cost-effective option, look into a budget pressure washer for car detailing; they often provide the necessary force without breaking the bank.
Finally, always wear appropriate safety gear. Debris can fly during the cleaning process, so protecting your eyes and skin is essential.
Understanding Spider Web Composition and Adhesion
To effectively tackle those intricate constructions found in corners and ceilings, it’s crucial to grasp their structure. Composed primarily of silk proteins, these threads exhibit remarkable strength and elasticity. The primary component, fibroin, creates a sturdy framework, while sericin, another protein, acts as a glue that binds the strands together. This combination results in a material that can withstand significant tension without breaking.
The adhesion properties of these structures stem from their unique chemical composition. The silk’s surface is hydrophobic, which means it repels water, allowing the strands to remain intact even in damp conditions. This trait makes traditional methods of cleaning less effective, as moisture can cause the silk to absorb water and become more resilient.
In my experience, understanding the nature of these creations allows for better cleaning strategies. For instance, employing a gentle approach with a tool that combines suction and soft brushing often yields better results than relying solely on forceful jets. This method preserves the surrounding surfaces while effectively dislodging the intricate filaments.
Another aspect worth considering is the location of these constructs. Areas with high humidity or frequent insect activity tend to have more robust formations. Therefore, adjusting cleaning techniques based on environmental conditions can significantly improve the outcome. Regular maintenance can prevent excessive buildup, making future cleaning tasks less daunting.
Choosing the Right Equipment for the Task
For effectively tackling those pesky formations, selecting the appropriate cleaning device is critical. Based on my extensive experience, I recommend opting for a model delivering at least 2000 PSI for this specific job. This level of force ensures that the sticky filaments are adequately dislodged from surfaces, making the cleaning process smoother.
Consider the Nozzle Type
The nozzle you choose can dramatically influence the outcome. A 25-degree fan nozzle is often ideal, as it provides a good balance of power and coverage. I once used a narrower nozzle and ended up causing damage to a wooden surface due to the intense focus of the stream. Always test on a small area first to gauge the impact.
Electric vs. Gas Models
Electric units are usually lighter and quieter, making them perfect for residential use, while gas models pack more power and are suited for larger tasks. I’ve recommended electric models for small patios or decks, as they are easy to manoeuvre and set up quickly. However, for extensive jobs, the gas-powered variants deliver superior performance. Remember to factor in your specific needs before making a choice.
Optimal Pressure Settings for Spider Web Removal
For effective elimination of those pesky structures, I recommend setting your machine to a range of 1500 to 2000 PSI. This level is robust enough to dislodge the silk without risking damage to surrounding surfaces. I’ve found that lower settings often leave remnants, while higher pressures can cause unwanted harm to delicate areas like painted surfaces or screens.
Adjusting Nozzle Types
Choosing the correct nozzle is equally important. A 25-degree nozzle is my go-to choice; it provides a broad spray that can cover more area while still being concentrated enough to tackle the task at hand. I remember a time when I used a 15-degree nozzle in an attempt to get into tight corners. While it worked, the force was too much for the adjacent paint, leading to chipping. Always consider the surface you’re working on.
Technique Matters
When targeting those structures, maintain a distance of about 2 to 3 feet. I’ve noticed that getting too close can result in damage, especially if you’re working on wood or vinyl siding. Move the nozzle in a sweeping motion rather than staying in one spot, which ensures you don’t concentrate the force too much in one area. This method guarantees a clean outcome without risking harm to your surfaces.
In my experience, a combination of the right settings, nozzle type, and technique leads to successful results. After all, nobody wants to deal with the remnants of those intricate structures lingering around their home!
Techniques for Targeting Spider Webs with a Pressure Washer
For an effective approach to eliminate those annoying silk threads, consider the following techniques:

- Angle Your Nozzle: Adjusting the nozzle to a 45-degree angle can effectively dislodge the filaments without causing damage to surrounding surfaces. This angle helps create a wider spray pattern, making it easier to catch all corners.
- Use a Wide Spray Pattern: Opt for a nozzle that provides a broader spray pattern. This increases your coverage area and ensures you don’t miss any hidden strands.
- Start from a Distance: Begin your cleaning from a distance of about three to four feet. Gradually move closer as you assess the effectiveness of the stream. This prevents excessive force that could damage delicate structures.
- Work in Sections: Divide the area into manageable sections. This way, you can ensure thorough cleaning and prevent re-soiling areas you’ve already tackled.
- Combine with Manual Tools: For stubborn strands, combine the use of your machine with manual tools like a broom or a brush. This dual approach can be particularly useful in tight corners or on textured surfaces.
- Follow Up with a Clean Water Rinse: After dislodging the threads, a final rinse with clean water helps remove any residual debris, ensuring a spotless finish.
- Safety First: Always wear protective eyewear and gloves. The force of the stream can cause debris to fly, posing a risk to your eyes and skin.
By employing these techniques, you can effectively target and eliminate silk threads from your home. For those curious about timing in the kitchen, check out how long to put the chana in pressure cooker for additional tips.
Safety Precautions When Using a Pressure Cleaner
Always wear protective gear. Safety goggles shield your eyes from debris, while gloves protect your hands from high-pressure water and chemicals. Sturdy footwear with slip-resistant soles is essential to prevent falls, especially on wet surfaces.
Before starting, inspect the area. Check for loose objects, electrical wiring, and fragile surfaces that could be damaged. Move any items that might get in the way or be harmed by the force of the spray.
Keep a safe distance from structures and surfaces. Maintain the recommended distance to prevent damage. For delicate surfaces, a wider spray pattern may be necessary to distribute the force evenly.
Be cautious with electrical outlets and water sources. Ensure that your equipment is grounded and that electrical connections are watertight. Use extension cords rated for outdoor use, and avoid standing in water while operating the device.
Never point the nozzle at yourself or others. The force of the stream can cause serious injury. Always direct the spray away from your body and ensure bystanders are at a safe distance.
Check the manufacturer’s guidelines for your equipment. Familiarise yourself with operational procedures and safety recommendations specific to your model. Adhering to these guidelines can prevent accidents and ensure a smooth experience.
After use, turn off the machine and disconnect it from the power source. This simple step prevents accidental activation and keeps everyone safe. Clean the equipment according to the manufacturer’s instructions to maintain its longevity.
Stay alert during operation. Fatigue can lead to mistakes. If you feel tired or distracted, take a break before continuing. Your safety and the integrity of the work are paramount.
Potential Damage to Surfaces from High-Pressure Washing
Using high-velocity cleaning equipment can lead to unintended consequences for various surfaces. I’ve witnessed firsthand how wood, brick, and even concrete can suffer from excessive force. Always start with a lower setting and assess the impact on the material before increasing the intensity.
Wooden decks and fences are particularly vulnerable. The fine grains can splinter or become gouged, especially if the nozzle is held too close. I recall a time when a friend attempted to rejuvenate his weathered deck, and the high force stripped away not just dirt but also a layer of wood, resulting in a rough surface that needed extensive sanding.
Brick surfaces may appear robust, but the mortar can easily be compromised. I once had to help a neighbour repair their patio after they used too high a setting, which dislodged mortar between the bricks. A more delicate touch could have preserved the integrity of the structure.
Concrete is often seen as resilient, but it can also be affected. The high impact can erode the surface, especially if it’s older or porous. A colleague of mine learned this the hard way; after an aggressive wash, the concrete surface became pitted, affecting not only its appearance but also its durability.
Always consider the condition of the surface before starting. If it’s been painted or sealed, high-force cleaning can strip away those layers. I recommend conducting a test on a small, inconspicuous area to determine how the surface will respond.
In summary, while high-velocity cleaning can be effective, it’s crucial to approach it with caution. Assess the surface, adjust the settings accordingly, and always prioritise the condition of the material to avoid costly repairs later on.
Post-Washing Clean-Up Tips for Spider Web Residue
After your task, it’s common to find remnants of silk clinging to surfaces. To tackle this, first, gather a broom or a vacuum cleaner with a brush attachment. A broom can effectively sweep away the fine strands without damaging the underlying material, while a vacuum can suck up debris with precision.
If you notice stubborn bits still clinging on, dampen a microfiber cloth with a mild soapy solution. Gently wipe over the affected areas; the moisture will help lift any remaining filaments. Avoid using harsh chemicals, as they can harm the finish of your surfaces.
For elevated areas or corners where webs tend to accumulate, consider using a long-handled duster. This tool allows you to reach high places without straining, ensuring you don’t miss those hard-to-reach spots.
After the initial clean-up, inspect the area for any signs of residue. If needed, repeat the damp cloth method, focusing on corners and crevices. Regular maintenance will also prevent webs from reappearing, so consider incorporating this clean-up into your routine.
Lastly, check your surroundings for any potential nesting spots. Sealing cracks and crevices around windows and doors can deter future silk producers from setting up shop. A little preventative action goes a long way in keeping your space tidy and inviting.
Preventing Spider Webs from Returning After Removal
To keep these nuisances at bay, it’s important to implement a strategy that discourages their reappearance. Start by eliminating potential habitats. Trim back shrubs and trees that touch your home, as they provide easy access for these eight-legged creators. Regularly maintain your garden, ensuring that it remains tidy and free from clutter, as debris can attract insects, which in turn draw spiders.
Using Natural Repellents
Consider using natural deterrents. Essential oils such as peppermint, tea tree, and citrus can be effective in keeping spiders away. Mix a few drops with water in a spray bottle and apply it to entry points, windowsills, and corners where webs are likely to re-establish. I’ve had great success with this method in my own home; the pleasant scent is an added bonus!
Sealing Entry Points
Inspect your property for cracks and gaps. Sealing these entry points is crucial. Use caulk or weather stripping to block any access routes. This simple step significantly reduces the likelihood of spiders moving indoors. I once overlooked a small gap around a window, which led to a recurring problem. Sealing it made a noticeable difference.
| Method | Description | Frequency |
|---|---|---|
| Garden Maintenance | Trim back plants and remove debris. | Weekly |
| Natural Repellents | Use essential oils in a spray. | Monthly |
| Sealing Gaps | Use caulk for cracks and gaps. | Seasonally |
Adopting these methods creates an environment that is less inviting for spiders. Regular maintenance and strategic prevention can greatly reduce their chances of returning. From my experience, consistency is key–stay diligent, and you’ll find your home remains free from these unwelcome guests.


.jpg)


