
.jpg)


.jpg "Will a pressure washer take paint off wood")
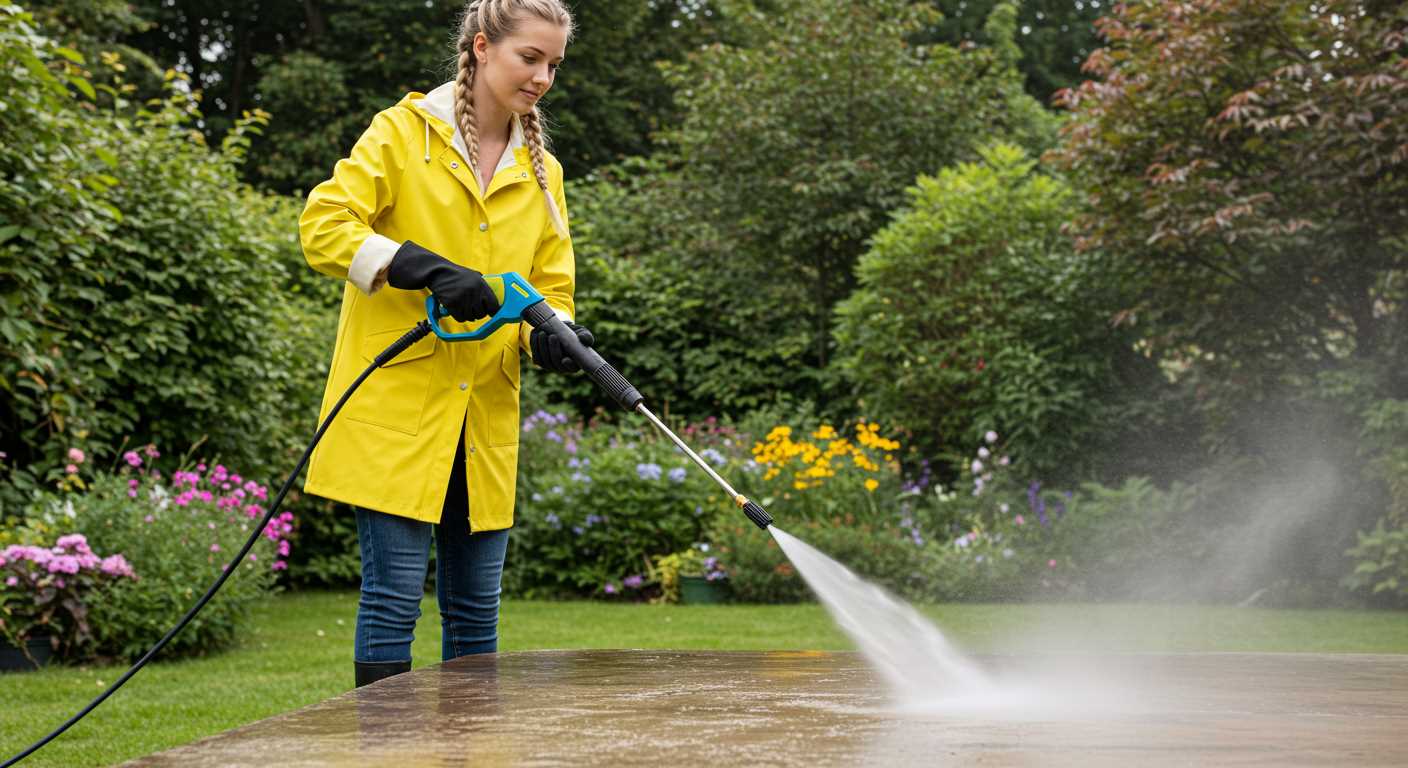
Using high-powered cleaning equipment can indeed strip layers from timber, including old varnish or paint. However, the effectiveness largely depends on the specific type of coating and the pressure setting. For instance, a lower pressure setting might be beneficial for delicate woods, while higher settings are more suited for tougher surfaces.
In my experience, it’s crucial to start with the right nozzle. A narrow, concentrated jet can work wonders on stubborn coatings, but it can also risk damaging softer timber if you’re not careful. I recall a project where I used a 15-degree nozzle on a weathered deck. The results were impressive, but I had to be mindful of my distance and angle to avoid gouging the wood.
Before embarking on this task, it’s wise to test a small, inconspicuous area. This not only helps gauge how the timber reacts but also allows you to adjust your technique as needed. I’ve seen too many people jump in without this step, leading to unexpected damage and costly repairs. Patience pays off when dealing with timber surfaces.
Another tip is to keep the surface wet during the process. This can help in the removal of debris and minimise the risk of splintering. I always keep a bucket of water handy for this purpose. It’s a simple precaution, but it can make a significant difference in the overall outcome.

Lastly, consider the environmental impact. Using these machines can lead to runoff that may affect nearby plants or water sources. Always check local regulations and guidelines to ensure responsible usage. I’ve learned to respect the power of this equipment, not only for its effectiveness but also for the responsibility it carries.
Removing Coatings from Timber Surfaces
Using high-velocity water jets can effectively strip unwanted layers from timber. My experience has shown that the technique works well for various finishes, but the outcome largely depends on a few key factors: the type of coating, the pressure setting, and the distance from the surface.
Coating Types and Their Behaviour
Different finishes respond uniquely to water jetting. For instance, varnishes and stains tend to break down more easily than thick layers of polyurethane. I recall a project where I tackled a weathered deck coated in a thick, stubborn sealant. After testing various angles and pressures, I found that a moderate setting at a 30-degree angle yielded the best results without damaging the timber beneath.
Technique and Distance
Maintaining an appropriate distance from the surface is crucial. Too close, and you risk gouging the wood; too far, and the efficiency diminishes. I generally recommend starting at least 12 inches away, gradually moving closer as needed while monitoring the effect. It’s also wise to keep the nozzle moving to avoid concentrating the force on one spot for too long, which can lead to uneven surfaces.
| Factor | Recommendation |
|---|---|
| Coating Type | Test on a small area to gauge effectiveness |
| Pressure Setting | Start with a moderate setting; adjust based on results |
| Distance | Begin at 12 inches; adjust as necessary |
| Nozzle Angle | Use a 30-degree angle for optimal results |
In conclusion, stripping finishes from timber can be highly effective with the right approach. Always assess the specific situation and adjust your technique accordingly for the best outcome.
Understanding Pressure Washer Settings for Paint Removal
Optimising settings is key for effective removal of coatings from surfaces. Start by selecting the correct nozzle. A 25-degree or 40-degree nozzle is a good choice for delicate materials like timber, ensuring a balance between force and safety.
Pressure Settings
Adjust pressure based on the type of surface and condition of the coating:
- Low pressure (1000-1500 PSI): Ideal for softwood or previously treated timber.
- Medium pressure (1500-2000 PSI): Suitable for most hardwoods with standard finishes.
- High pressure (2000-3000 PSI): Use cautiously on extremely tough paints or when working with weathered surfaces.
Distance and Technique
Maintain a distance of 12-18 inches from the surface for optimal results. Moving too close can damage the timber, while staying too far may reduce effectiveness. Use a sweeping motion to evenly distribute force and prevent gouging.
- Test on a small, inconspicuous area first.
- Adjust distance as necessary based on results.
- Keep the nozzle moving to avoid concentrated pressure on one spot.
In my experience, patience is crucial. Multiple passes may be required, especially with stubborn layers. Always wear protective gear, as debris can fly during the process. By mastering these settings, achieving a clean surface becomes simpler and more efficient.
Choosing the Right Nozzle for Wooden Surfaces
For optimal results on timber, select a nozzle that balances pressure and coverage. A 25-degree nozzle is often ideal, providing enough force to remove unwanted layers without damaging the substrate. This angle helps disperse the water, preventing concentrated hits that could gouge the surface.
Understanding Nozzle Types
Each nozzle has a specific purpose. The zero-degree nozzle might seem tempting for tough spots, but it creates a very focused stream that can easily harm softer woods. The 15-degree nozzle, on the other hand, delivers a stronger jet but should be used with caution, as it risks splintering the material.
During one project, I was tasked with revitalising an old garden bench. I started with the 15-degree nozzle, thinking it would be efficient. However, I quickly switched to the 25-degree nozzle after noticing minor damage. The broader spray allowed me to work effectively without compromising the wood’s integrity.
Technique Matters
Effective technique complements the choice of nozzle. Maintain a consistent distance of at least 12 inches from the surface to prevent chipping or etching. Move the nozzle in a sweeping motion, overlapping each pass slightly to ensure even treatment. This method not only protects the wood but also promotes a uniform finish.
In my experience, adjusting the distance and angle of the nozzle can significantly influence the outcome. On another occasion, while restoring a deck, I found that tilting the nozzle slightly downward helped dislodge stubborn flakes without risking damage. Always test in an inconspicuous area first to gauge the impact.
Choosing the correct nozzle and applying the right technique can make the difference between a successful restoration and an unfortunate mishap. Always prioritise the wood’s condition and adjust your approach accordingly for the best results.
Safety Precautions When Using a Pressure Washer on Wood
Always wear appropriate protective gear. This includes safety goggles to shield your eyes from debris, gloves to protect your hands, and sturdy footwear to prevent slips. I recall a day when I neglected my footwear and ended up with a nasty slip while working with a surface cleaner attachment. It taught me the hard way about the importance of proper attire.
Maintain a Safe Distance
Keep a safe distance from the surface. A minimum of 12 inches is advisable when starting, gradually moving closer only if necessary. I remember the first time I got too close, resulting in gouges that took hours to fix. The impact can be significant if the distance is not maintained. Adjust the distance based on the results you observe.
Check for Surroundings
Before beginning, inspect the area. Remove any obstacles or items that could be damaged or cause accidents. I once had a garden gnome that didn’t survive a cleaning session due to my lack of foresight. Also, ensure that pets and children are at a safe distance to avoid any mishaps. Awareness of your surroundings can save you from unnecessary troubles.
Preparing the Wooden Surface Before Pressure Washing
Clear the area around the wooden structure. Remove furniture, potted plants, and any obstacles that could interfere with the washing process. This ensures a smooth workflow and prevents potential damage to surrounding items.
Inspect the surface for loose or peeling sections. Use a scraper to remove any flaking material, as this will enhance the efficiency of your cleaning effort. Any remaining loose bits can clog the nozzle and result in an uneven finish.
Clean the wood with a brush or a cloth to remove dirt, mildew, and other debris. A solution of water and mild detergent can help in breaking down grime. Rinse thoroughly before commencing with high-pressure cleaning to ensure a clean base.
Consider applying a wood stabiliser or a pre-treatment product designed for enhancing the surface before washing. These products can help in preparing the wood to better withstand the force of the water.
Check the weather forecast. Ideally, choose a day that is dry and overcast. Direct sunlight can dry the wood too quickly, leading to streaks and potential damage.
Lastly, ensure you have the right equipment ready. A best algae scrubber for aquarium can be useful for cleaning any stubborn algae or growths on the wood surface prior to washing. This extra step will help achieve a more thorough clean.
| Preparation Step | Description |
|---|---|
| Clear Area | Remove obstacles and furniture from the vicinity. |
| Inspect Surface | Identify and scrape off any loose or peeling sections. |
| Initial Cleaning | Use a brush or cloth and mild detergent to clean the surface. |
| Apply Treatment | Consider using a stabiliser or pre-treatment product. |
| Check Weather | Avoid direct sunlight; choose a dry day. |
| Gather Equipment | Have all necessary tools at hand, including scrubbers. |
Techniques for Effective Paint Removal from Wood
Start with the right angle. When aiming the spray, keep it at a 45-degree angle to the surface. This helps to avoid gouging and ensures better removal without damaging the underlying material.
Adjust the distance carefully. Maintain a distance of about 12 to 18 inches from the surface. Closer distances can lead to splintering, while being too far may not provide enough force to lift the coating.
Utilise a sweeping motion. Move the nozzle in a consistent back-and-forth pattern, overlapping each pass slightly. This technique allows for uniform removal and reduces the chance of missing spots.
Combine techniques for stubborn areas. If certain sections resist your efforts, consider using a lighter setting to loosen the finish, then switch to a higher intensity for a more effective clean. This two-step approach often works wonders.
Consider using an eco-friendly detergent. Applying a biodegradable cleaner before the blasting process can help break down the coating and make removal easier. Be sure to rinse thoroughly afterwards to prevent residue.
Assess the wood’s condition regularly during the process. Check for any signs of damage or excessive wear. If the surface shows signs of distress, it might be wise to pause and evaluate your technique.
After removing the finish, rinse the area thoroughly. This step clears away any remaining debris and prepares the surface for new treatments, ensuring a clean slate for refinishing.
Plan for follow-up work. After the initial clean, expect to sand and possibly refinish the surface. This will help restore the wood’s natural beauty and protect it from future wear.
Common Mistakes to Avoid When Using a Pressure Washer
Using a high-powered cleaning device can be efficient, but several missteps can lead to unsatisfactory results or damage. Here are critical errors to avoid:
- Incorrect Nozzle Selection: Not all nozzles suit every surface. Using a narrow nozzle can gouge soft materials like timber. Always opt for a wider spray for delicate areas.
- Improper Distance: Keeping the sprayer too close can cause surface damage. Maintain a distance of at least 12 to 18 inches, adjusting as needed based on the surface condition.
- Neglecting Surface Preparation: Skipping the cleaning of loose debris, dirt, or mildew can inhibit effective results. Ensure the surface is clear before starting.
- Ignoring Safety Gear: Eye protection and gloves are vital. High-velocity water can cause injuries; don’t overlook personal safety.
- Using Wrong Cleaning Agents: Some chemicals can harm wooden surfaces. Always read labels and opt for products specifically designed for use with high-powered equipment.
- Forgetting to Test a Small Area: Before proceeding, test on a less visible spot to gauge how the surface reacts. This step can prevent larger issues later.
- Improper Angle of Spray: Directing the spray straight on can cause more harm than good. Aim at an angle to reduce the chance of damaging the surface.
- Overlapping Strokes: Failing to overlap strokes can lead to uneven cleaning. Work methodically, ensuring even coverage without missing spots.
- Not Using a Foam Sprayer: Investing in a foam sprayer for pressure washer can enhance cleaning efficiency, especially with stubborn residues.
- Rushing the Process: Take your time. Quick movements can lead to missed areas or uneven results, so patience is key.
Avoiding these common pitfalls will lead to a more successful cleaning experience and help maintain the integrity of your wooden surfaces.
Assessing the Condition of Wood After Paint Removal
After the stripping process, inspect the surface for any damage. Look for signs of splintering, cracking, or warping, which can indicate that the timber has been compromised. If you notice rough patches, sanding may be necessary to restore a smooth finish. I’ve often found that a light sanding can really enhance the appearance of the wood, making it ready for any new treatment or finish.
Checking for Moisture Content
Utilising a moisture meter can provide an accurate reading of the timber’s moisture levels. Ideally, the moisture content should be below 15% before proceeding with staining or sealing. I once made the mistake of applying a sealant to damp timber, and it led to peeling and blistering within months. It’s a lesson that taught me to always check moisture levels first.
Identifying Remaining Residue
After the removal, examine the surface for any leftover residue from the previous coating. A thorough cleaning with a mild detergent and water can help eliminate any remnants that may hinder adhesion of new finishes. Occasionally, I’ve found that a second round of light washing is necessary to ensure a completely clean surface before applying a fresh coat. Being meticulous at this stage pays off in the long run.
Alternative Methods for Paint Removal from Wood
For those looking to strip finishes from timber without using high-pressure techniques, there are several reliable alternatives that can yield excellent results.
Chemical Strippers
Chemical paint removers are among the most effective options. Here’s how to use them:
- Select a product that is suitable for wood surfaces, preferably one that is biodegradable and low in volatile organic compounds (VOCs).
- Apply a generous amount to the area using a brush, ensuring even coverage.
- Allow it to sit for the recommended time to soften the layers of finish.
- Use a scraper or putty knife to gently lift the softened paint. Always work with the grain to avoid damaging the wood.
- Wash the surface with water and a cloth to remove any residue.
Heat Guns
Using a heat gun can also be an effective method for finish removal. Here’s a straightforward approach:
- Set the heat gun to a low setting to avoid scorching the timber.
- Hold the gun a few inches away and move it in a sweeping motion over the surface.
- As the finish begins to bubble, use a scraper to peel it off while it’s still warm.
- Be cautious of overheating the wood, which can cause warping or damage.
Both of these methods require safety measures such as gloves and masks to protect against fumes and debris. Always ensure proper ventilation when using chemical products or heat sources. Each method has its pros and cons, so consider the specific needs of your project when choosing the best approach for your timber restoration tasks.
Environmental Considerations When Using a Pressure Washer
Always ensure the area is free from debris and delicate flora before starting. I recall a project where I inadvertently sprayed a neighbour’s flower bed, which led to some pretty unhappy gardening enthusiasts. Protecting plants with tarps or cardboard can save you from an awkward conversation later.
Utilise biodegradable detergents when necessary. These products can help in breaking down stubborn residues without harming the surrounding ecosystem. I once tried a conventional cleaner, and it inadvertently affected a nearby pond, resulting in a fish rescue operation that was far more involved than I anticipated.
Be mindful of runoff. Directing the stream towards a grassy area rather than a storm drain can prevent contaminants from entering local water systems. During one of my projects, I noticed that water pooled in a low area, which could have contributed to pollution if not managed properly.
Consider the weather before starting any work. Rain can wash away any chemicals used, and strong winds can carry debris and water to unintended areas. I’ve learned the hard way that a sudden gust can turn a simple task into a mess that takes hours to clean up.
After completing your task, clean the equipment thoroughly. Residual chemicals and dirt can be harmful if they leach into the environment. I’ve developed a routine where I rinse everything down and ensure no remnants are left behind, which keeps my gear in good shape and the environment safe.
Lastly, educate yourself about local regulations regarding water usage and chemical applications. Some areas have strict guidelines that I’ve had to navigate. Ignoring these can lead to fines or damage to your reputation, so it’s always worth checking first.

.jpg)


