


The short answer is yes; a high-powered cleaning device can potentially harm your tile joints if not used with caution. From my years in the industry, I’ve seen many homeowners excitedly tackle their outdoor surfaces, only to find themselves facing the consequences of too much force applied in the wrong way.
During one particular incident, a friend of mine decided to rejuvenate his patio. He opted for maximum pressure, thinking it would deliver the best results. Initially, the tiles looked immaculate, but the aftermath revealed a different story. The intense stream had eroded the grout between the tiles, leading to further issues such as water infiltration and subsequent mould growth. This experience highlights the importance of using the correct settings and techniques.
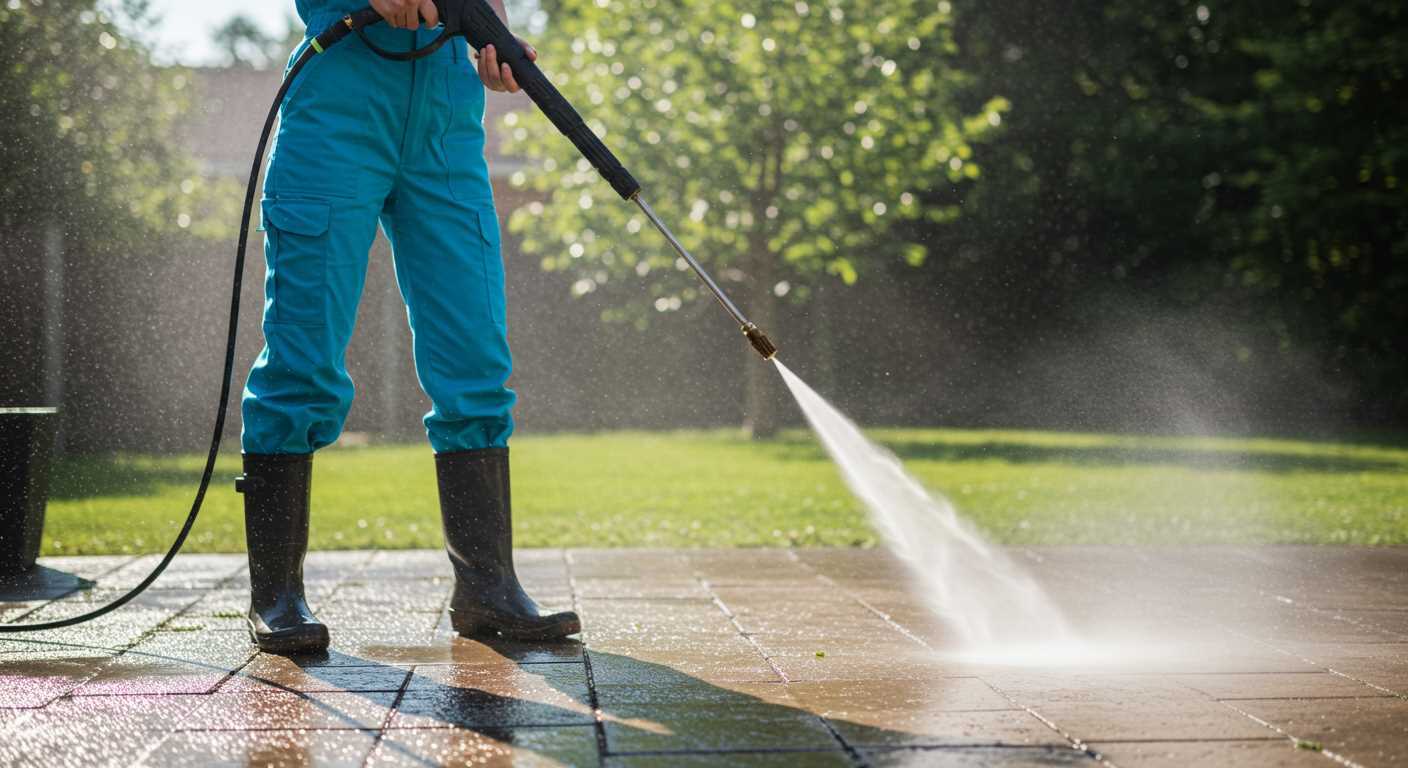
To safely clean your tiled areas, start with a lower setting and gradually increase the power as needed. It’s advisable to use a fan spray nozzle rather than a concentrated jet, as it disperses the force over a wider area, significantly reducing the risk of harm. Always maintain a safe distance from the surface to ensure that you’re not applying excessive force directly onto the joints.
In my experience, combining good cleaning techniques with the right equipment ensures that your tiles stay in pristine condition without compromising the integrity of the grout. A little caution goes a long way in maintaining your surfaces effectively.
Impact on Tile Joints
Using high-output cleaning equipment can adversely affect tile joints, depending on several factors. It’s crucial to assess the type of grout and the condition of the surface before proceeding.
Types of Grout
- Cement-based: This variant is susceptible to erosion under intense water jets. I’ve seen cement grout wear away, especially if the nozzle is too close or the angle is incorrect.
- Epoxy: More resilient against vigorous cleaning, epoxy grout typically withstands high water flow better. However, care should still be taken to avoid dislodging tiles.
Best Practices
- Maintain a distance of at least 30 cm from the surface to minimise risk.
- Utilise a wide-angle nozzle to disperse water pressure, reducing direct impact.
- Test a small area first to observe the effect on the joint material.
- Consider using a lower pressure setting if available, particularly on older installations.
In my experience, a cautious approach yields the best results. Regular maintenance with gentler methods can prolong the life of tile joints significantly.
Understanding Grout Composition and Durability
Grout is primarily composed of a mixture of water, cement, and sometimes sand. The blend creates a bond that fills the gaps between tiles, providing structural support while enhancing appearance. The durability of grout relies heavily on its formulation, which can vary based on intended use. For instance, epoxy grout offers superior resistance to moisture and stains compared to traditional cement-based options, making it ideal for high-traffic areas or wet environments.
Factors Influencing Grout Longevity
Several factors contribute to the longevity of grout. One key element is the installation method; proper sealing can significantly enhance its lifespan. Environmental conditions, such as humidity and exposure to harsh chemicals, also play a role. Regular maintenance, including gentle cleaning, helps preserve grout integrity. It’s advisable to avoid harsh cleaning tools, as they can erode the surface and compromise the bond. For those considering a thorough clean, medium duty pressure washers can be a safe option, provided they are used correctly.
Common Grout Issues
Over time, grout may develop cracks or discolouration. These issues often stem from improper installation or lack of maintenance. If you notice your grout is looking worn, it may be time for a refresh. In many cases, re-sealing can restore its appearance and prevent further deterioration. Always consult with experts if you’re unsure about the right approach. Just like knowing how long to put potatoes in pressure cooker ensures a perfect meal, understanding grout maintenance leads to lasting results.
Pressure Washer Settings: What You Need to Know
To prevent harm to your tiled surfaces, adjust the nozzle to a wider spray pattern and reduce the intensity setting to around 1200-1500 PSI. This range is typically safe for most types of tiles and their accompanying sealants.
Optimal Nozzle Selection
Choosing the right nozzle is critical. I always recommend starting with a 25-degree nozzle. It provides a broader spray that disperses the force, minimizing the risk of dislodging joint material. If you notice stubborn stains, you can switch to a 15-degree nozzle for tougher spots, but be cautious to maintain a safe distance.
Distance Matters
Maintaining an adequate distance from the surface is essential. I usually advise keeping the nozzle at least 12 to 18 inches away from the tiles. This distance allows for effective cleaning while reducing the risk of stripping away the filler between the tiles.
Best Practices for Cleaning Grouted Surfaces
Start with a thorough inspection of the area. Look for cracks or loose tiles that may need attention before cleaning. It’s crucial to address any structural issues to prevent further complications during the cleaning process.
Choosing the Right Cleaning Solution
Select a suitable cleaning agent based on the type of grout. For cement-based grout, a mixture of warm water and mild detergent often works well. For tougher stains, consider a solution of vinegar and baking soda. Avoid acidic cleaners on coloured grout as they can lead to fading.
Technique Matters
Apply the cleaning solution evenly using a soft-bristle brush. Scrubbing in a circular motion allows for better penetration into the grout lines. Rinse with clean water to remove any residue and ensure no cleaning agent is left behind, which could cause discolouration over time.
For extensive areas, a dedicated tile and grout cleaner can save time and effort. Always follow the manufacturer’s instructions for dilution and application. After cleaning, allowing the surface to dry properly is vital, as moisture can lead to mould growth.
Lastly, consider sealing the grout after it has dried completely. A quality sealer will help protect against stains and moisture ingress, extending the life of your surfaces significantly.
Signs of Grout Damage After Pressure Washing
After a thorough cleaning session, be on the lookout for specific indicators that the integrity of the grout has been compromised. One of the first signs is a visible change in colour. If the grout appears lighter or has developed uneven patches, it might indicate that the surface has been eroded or that the sealant, if present, has been stripped away.
Cracks and Chips
Inspect the grout lines closely. Small cracks or chips can emerge, revealing a loss of cohesion. If you notice any cracks wider than a hairline, it’s a strong indication that the material has suffered stress. Pay attention to corners and joints, as these areas are particularly susceptible to damage.
Loose Grout
Another telltale sign is when the grout feels loose or can be easily pulled away from the surface. If you can gently tug at the grout and it comes away without much effort, it’s a sign that the bond with the underlying material has weakened significantly. This can lead to further issues, such as water infiltration and mould growth.
Look for crumbling edges or sections where the grout has started to flake off. If you spot these issues, it’s prudent to address them immediately to prevent further degradation. Regular inspections after cleaning can help maintain the appearance and longevity of your surfaces.
Comparing Pressure Washing to Alternative Cleaning Methods
For those contemplating the most suitable approach to clean tiled areas, I’ve found that traditional scrubbing, steam cleaning, and chemical solutions each have their pros and cons compared to the high-pressure method. In my experience, the latter can be effective but requires caution.
When I first explored alternatives, traditional scrubbing with a stiff brush and a strong detergent proved time-consuming but allowed for precise control over the cleaning process. I noticed that while this method is labour-intensive, it’s gentler on grout and allows for targeted cleaning of stubborn spots without compromising the surrounding tiles.
Steam cleaning emerged as another contender. The high temperature loosens dirt and grime effectively. However, I encountered issues with certain types of grout that couldn’t withstand the heat. For sensitive surfaces, this method may not be the best choice, as I’ve seen grout deteriorate under excessive heat exposure.
Chemical cleaners often promise quick results. I had a mixed experience with them. Certain formulations worked wonders on mildew and stains, but some are too harsh, leading to discolouration or weakening of the grout over time. Always check the compatibility of the cleaner with your tile and grout type before applying.
In summary, high-pressure cleaning can offer impressive results but should be approached carefully. From my perspective, combining methods might yield the best outcome: using a gentle scrub for maintenance, steam for deep cleaning, and resorting to high-pressure techniques for tough jobs only when necessary. This balanced strategy has served me well throughout my years in the field.
How to Protect Grouting When Using a Pressure Washer
To safeguard your joints while cleaning with high-pressure equipment, follow these specific steps:
Adjust Your Technique
- Use a fan spray nozzle instead of a concentrated one. This distributes the force more evenly and reduces the risk of eroding the mortar.
- Maintain a distance of at least 12 inches from the surface. This helps lessen the intensity of the water stream on vulnerable areas.
- Keep the nozzle moving. Avoid focusing on one spot for too long, as this can wear down the adhesive.
Choose the Right Settings
- Set the machine to a lower PSI (pounds per square inch). A setting around 1200 to 1500 PSI is often sufficient for cleaning tiled surfaces without being too aggressive.
- Consider the temperature of the water. Hot water can be more effective at breaking down grime but may not be necessary for all surfaces.
In my experience, having the right tools and settings can make a significant difference. I’ve seen too many people rush into cleaning without understanding how their equipment interacts with the materials they are working on. Taking these precautions can prolong the life of your tiled surfaces and joints.
After cleaning, inspect your joints for any signs of wear or loosening. It’s wise to address any issues immediately to prevent further deterioration. Regular maintenance can also help keep everything looking pristine.
Lastly, always follow the manufacturer’s guidelines for both the cleaning machine and the surfaces you are treating. It’s a simple step that can save a lot of hassle down the line.
When to Consult a Professional for Grout Maintenance
Assessing the condition of your tile joints can save you from costly repairs down the line. If you notice significant discolouration that cleaning can’t rectify, or if there’s visible cracking, it’s time to seek expert help. I remember a client who attempted to rejuvenate their tiled bathroom themselves. Despite their best efforts, they ended up with uneven surfaces and loose tiles, leading to a much pricier repair bill than if they had consulted a specialist initially.
Another indicator for professional assistance is the presence of mould or mildew that persists despite your cleaning efforts. It can indicate deeper issues, such as moisture seeping through the tiles or beneath them. I once encountered a situation where a homeowner thought a simple scrub would suffice, but it turned out to be a sign of a leaking pipe, which required a plumber’s intervention before any cleaning could effectively take place.
It’s also wise to consult a professional if you’re unsure about the right cleaning methods or products. I once advised a friend who was hesitant about using certain chemicals on his kitchen tiles. He chose to go with his gut and ended up with a discoloured surface. Understanding the composition of the grout can help inform the right cleaning approach, and professionals have the necessary knowledge to avoid these pitfalls.
Lastly, if you’re facing extensive repairs or installation of new tiles, hiring an expert ensures that the job is done correctly from the start. I’ve seen DIY projects turn into disasters simply because the homeowner underestimated the complexity of the task. Investing in quality workmanship can save time and money in the long run.
| Signs to Consult a Professional | Recommended Action |
|---|---|
| Significant discolouration | Schedule an inspection for potential replacement |
| Visible cracking or loose tiles | Contact a specialist for assessment |
| Persistent mould or mildew | Consult a professional to identify underlying issues |
| Uncertainty about cleaning products | Seek expert advice on suitable methods |
| Extensive repairs or renovations needed | Hire a contractor for proper installation |

.jpg)


