


Using high-force cleaning equipment on joint material can lead to unintended consequences if not approached with caution. From my years of experience in the cleaning equipment industry, I can say that the risk of harming the joints is real, particularly if the wrong settings or techniques are employed.
For instance, I recall a situation where a homeowner enthusiastically tackled their patio using a high-powered unit, only to find that the intense force eroded the joint material between the pavers. This not only compromised the appearance but also the structural integrity of the installation. To avoid such mishaps, it’s crucial to adjust the nozzle and pressure settings appropriately.

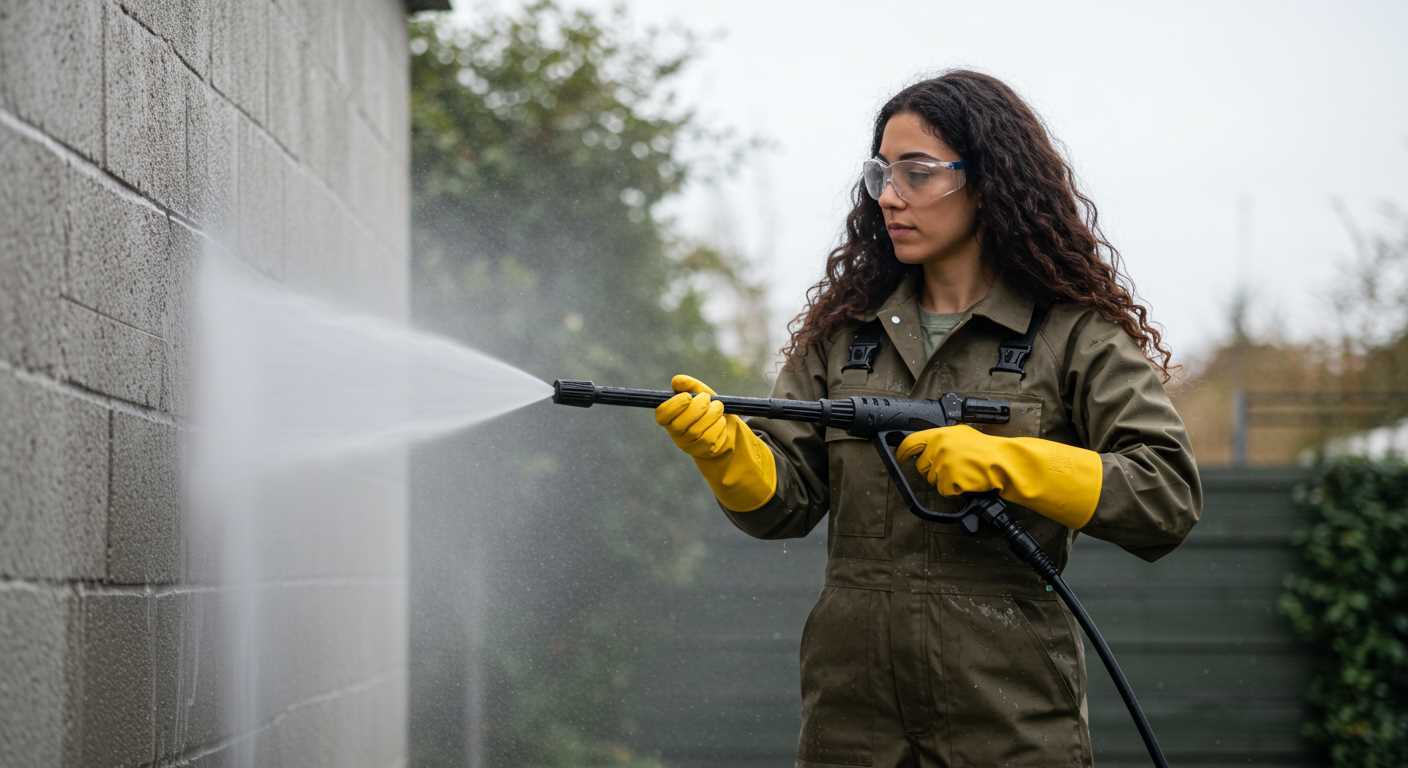
I recommend starting with the lowest pressure setting and gradually increasing it while observing the impact on the joints. A fan-shaped nozzle can help distribute the force more evenly, reducing the risk of dislodging any material. Always maintain a safe distance from the surface, ideally around 12 to 18 inches, to ensure that the force isn’t concentrated on one spot for too long.
Additionally, consider the type of joint material being cleaned. Some are more resilient than others, and understanding these nuances can make a significant difference in the outcome. Taking the time to assess the situation before diving in with high-force cleaning can save you from costly repairs down the line.
Will High-Force Cleaning Tools Harm Joint Mortar?
Yes, they can lead to deterioration of joint material if not handled correctly. The intensity of the stream can erode the binding agents, especially in older installations.
Key Factors to Consider
- Distance: Maintain a distance of at least 2 feet from the surface. This reduces the force impact on the joints.
- Nozzle Type: Use a wider spray nozzle. A 25-degree or 40-degree nozzle offers a gentler spray, decreasing the risk of wear.
- Water Temperature: Avoid using hot water as it can soften the joint material, making it more susceptible to abrasion.
Best Practices
- Test a small, inconspicuous area first to see how the mortar reacts.
- Use a lower setting for the water flow. High settings can strip away the joint material quickly.
- Regularly inspect the joints after cleaning. Look for cracks or erosion that may indicate damage.
From personal experience, I’ve seen how a careless approach can lead to costly repairs. My advice? Always prioritise caution and use the right technique. Avoid rushing the process; a careful approach will ensure the longevity of the surfaces you’re cleaning.
Understanding Mortar Composition and Its Durability
For those dealing with brickwork or stone structures, knowing the components of bonding agents is essential. Traditional mixtures often comprise Portland cement, lime, and sand. The ratios of these elements determine the strength and longevity of the mixture. A common formulation is one part cement, one part lime, and six parts sand, though variations exist based on environmental conditions and specific applications.
Factors Influencing Longevity
Moisture resistance is a critical aspect of these substances. Lime enhances flexibility and helps manage the expansion and contraction that occurs with temperature fluctuations. This flexibility reduces the risk of cracking over time. Meanwhile, the type of sand used can influence durability; finer sands improve workability, while coarser sands can enhance strength. Additionally, additives like acrylics can be included for further resilience against moisture and wear.
Environmental Impact on Composition
Climate plays a significant role in the performance of these bonding agents. In harsher environments, such as areas with freeze-thaw cycles, a more robust mixture is required. The presence of salts or pollutants can also accelerate degradation, necessitating regular maintenance. Proper sealing techniques can mitigate some of these issues, extending the lifespan of the structure.
Pressure Washer Specifications: PSI and GPM Explained
To avoid compromising structural integrity, select a model with a PSI (pounds per square inch) rating suitable for your task. For most residential applications, a range of 1300 to 2000 PSI is sufficient. Higher ratings, such as 3000 PSI, are best reserved for tough stains on concrete or heavy-duty cleaning projects.
Understanding PSI
PSI is crucial in determining the force of water exiting the nozzle. Here’s how different PSI levels affect cleaning:
- 1300-2000 PSI: Ideal for delicate surfaces like wood or painted areas. Safe for cleaning cars and outdoor furniture.
- 2000-2700 PSI: Suitable for concrete driveways, patio furniture, and more robust surfaces.
- 2700-3000 PSI: Effective for heavy-duty tasks such as stripping paint or deep cleaning concrete.
The Role of GPM
GPM (gallons per minute) measures water flow. A higher GPM means more water is used, which helps rinse away dirt and grime more effectively. Here’s a breakdown:
- 1.2-1.5 GPM: Sufficient for light cleaning jobs, including vehicles and outdoor equipment.
- 1.5-2.5 GPM: Recommended for general household cleaning, providing a balance between power and efficiency.
- 2.5-3.0 GPM: Best for large areas, commercial use, or when tackling heavy dirt accumulation.
Combining appropriate PSI and GPM optimises performance while minimising risks to surfaces. Always test a small, inconspicuous area before proceeding with full-scale cleaning to ensure your equipment is suitable for the job.
Identifying Different Types of Mortar and Their Resistance
Understanding the various types of binding compounds is crucial for gauging how they respond to high-intensity cleaning methods. For instance, traditional lime-based mixtures are more susceptible to erosion compared to modern cement-based formulations. Lime mortar, often found in historic buildings, typically offers flexibility but lacks the strength of its cement counterparts.
Cementitious blends, especially those enhanced with additives, exhibit improved durability. These mixtures are designed to withstand harsher environmental conditions and resist wear from cleaning techniques. I recall a project where we used a high-performance cement mix for a patio installation. After years of regular maintenance, the joints remained intact despite frequent exposure to vigorous cleaning.
Thin-set mortars, commonly used in tile installations, also display varied resilience. While they bond tiles effectively, their composition might not withstand aggressive water jets without some degradation. An instance comes to mind where a client opted for a quick clean on their tiled patio, resulting in some grout loss that necessitated repairs.
Recognising the specific type of mix used in your structure can help anticipate how it will react under forceful cleansing. For example, if your project incorporates mortar mixes with polymer additives, these are generally more robust and can handle substantial water pressure without significant issues. I’ve seen these perform admirably in both commercial and residential settings.
In summary, knowing the type of binding agent in your construction can guide you in selecting appropriate cleaning techniques. Always consult with a specialist if unsure, especially when dealing with older structures where preservation is key.
How Pressure Washing Affects Mortar Integrity
Using a high-powered cleaning unit can significantly impact the integrity of your joint material, especially if the settings are mismanaged. During my years working with various models, I witnessed the consequences firsthand. One time, I tested a unit with a PSI rating of 3000 on an older brick structure. The intense force stripped away not only grime but also some of the joint material itself, leading to cracks and a compromised structure.
Understanding the Risks

When selecting a cleaning tool, the specifications matter. A unit with excessive force can erode the binding agents in the joint mixture, especially if it’s a softer type. I’ve seen situations where users, excited by the results, applied too much pressure, inadvertently causing more harm than good. For instance, a homeowner aimed for a clean facade but ended up needing repairs due to weakened joints.
Best Practices for Safe Cleaning
To preserve the integrity of your joint material, opt for lower settings, ideally around 1500 to 2000 PSI, and maintain a safe distance from the surface. Using a fan nozzle can help diffuse the force, reducing the risk of erosion. It’s also wise to test a small area first to assess how the material reacts before proceeding with the entire surface. My own approach has always been cautious, prioritising preservation alongside cleanliness. This way, you achieve a fresh look while ensuring structural stability.
Recommended Pressure Settings for Cleaning Mortar
For optimal results when cleaning joints, I advise using a pressure setting between 1500 and 2500 PSI. This range effectively removes grime without compromising the structural integrity of the joints. Always start at the lower end and gradually increase the intensity as needed.
Flow Rate Considerations
The flow rate, measured in gallons per minute (GPM), also plays a crucial role. A GPM range of 1.4 to 2.5 is ideal, ensuring sufficient water flow to rinse away debris while preventing excessive force. A higher flow rate can enhance cleaning efficiency, but it’s essential to maintain a balance to avoid erosion.
Optimal Nozzle Selection
Selecting the right nozzle is just as important as the pressure settings. A 25-degree nozzle is commonly recommended for cleaning joint surfaces, as it provides a wider spray pattern, reducing the risk of damaging the surrounding surfaces. Avoid using a zero-degree nozzle, as it concentrates the force too much.
| Pressure Setting (PSI) | Recommended GPM | Nozzle Type |
|---|---|---|
| 1500 – 2000 | 1.4 – 2.0 | 25-degree |
| 2000 – 2500 | 2.0 – 2.5 | 15-degree |
In my experience, ensuring the right settings and equipment can make all the difference in maintaining the integrity of the joints. For those interested in portable solutions, you might explore options like a portable pressure washer philippines for easy handling during your cleaning tasks.
Techniques to Minimise Damage While Using a Pressure Washer
Always start by selecting the appropriate nozzle for your task. A wider spray angle, such as 25 degrees or 40 degrees, disperses water over a larger area, reducing the risk of harm. I’ve found that the 25-degree nozzle works wonders for cleaning without being overly aggressive.
Maintain a safe distance from the surface while cleaning. Keeping the nozzle at least 12 to 18 inches away helps prevent excessive force from impacting the structure. I remember a job where I got too close, and it resulted in some unintended wear. A little distance goes a long way.
Adjusting Water Pressure
Before starting, adjust the water pressure settings to the lowest effective level. I usually begin with a lower PSI and gradually increase it only if necessary. This method not only preserves the material but also helps you gauge the right amount of force needed for effective cleaning.
Cleaning Technique
Employ a sweeping motion rather than a direct spray. This technique distributes water more evenly and prevents concentrated force on any one spot. While working on a patio, I noticed that sweeping back and forth provided better results without compromising the surface integrity.
Lastly, consider the temperature of the water. Using cold water is often sufficient for most cleaning tasks. Hot water can sometimes be too harsh, especially on older or more delicate materials. From my experience, cold water does the job effectively while being gentler on surfaces.
Signs of Mortar Damage After Pressure Washing
Identifying the effects of high-velocity cleaning on your joints is crucial for maintaining structural integrity. Look for the following indicators to assess potential harm:
Visual Indicators
- Cracking: Inspect the surfaces for new or widened fissures, which can compromise stability.
- Flaking: Observe if the material is peeling away, indicating erosion due to excessive force.
- Discoloration: Changes in hue, especially lighter patches, may suggest that the surface layer has been stripped away.
Structural Integrity Checks
- Sound Test: Tap lightly on the joints; a dull sound can indicate deterioration.
- Water Penetration: After cleaning, monitor for water pooling or seepage, suggesting compromised barriers.
- Loose Bricks or Stones: Ensure that masonry elements remain secure; movement can signal underlying issues.
Regular inspections following any intensive cleaning regimen can help in early detection of issues, allowing for timely repairs and maintenance to preserve your construction’s longevity.
Alternative Cleaning Methods for Mortar Surfaces
Consider using a mixture of warm water and a mild detergent applied with a soft-bristled brush. This method allows for thorough cleaning without the risk of harming the substrate. I’ve found that a little elbow grease can go a long way, especially for stubborn stains.
Steam Cleaning
Steam cleaning is another effective technique. The high temperature of the steam loosens dirt and grime without the aggressive force that can compromise the structural integrity of joints. In my experience, this method works particularly well on vertical surfaces where dirt tends to accumulate. Ensure that the steam cleaner is set to an appropriate temperature to avoid any unintended effects on the surface.
Using Vinegar and Baking Soda
A natural solution involving vinegar and baking soda can also yield impressive results. Create a paste with these two ingredients; apply it to the affected areas and let it sit for 30 minutes before scrubbing gently. This combination not only cleans but also deodorises, making it a dual-purpose remedy. After rinsing, the surface looks remarkably refreshed. Just be cautious with the ratios to avoid any excessive bubbling or run-off that could affect surrounding materials.
For more information on optimal cleaning equipment, check out this guide on the best car wash pressure washer psi to ensure you select the right tools for your needs.
When to Consult a Professional for Mortar Repairs
If you observe signs of wear or deterioration in your jointing material, seeking expert assistance is advisable. Cracks, crumbling, or excessive erosion indicate underlying issues that require specialised attention. Inadequate repairs may lead to further complications, including structural instability.
During my years in the cleaning equipment industry, I encountered many scenarios where homeowners attempted to rectify jointing issues on their own. Often, these DIY efforts resulted in more significant problems. For example, one client used a high-velocity cleansing device without evaluating the composition of the jointing material, leading to extensive fissures that necessitated complete replacement.
Engaging a skilled tradesperson is particularly important if:
- The damage spans a large area or affects crucial structural components.
- You notice water intrusion, which can exacerbate deterioration.
- There is uncertainty regarding the type of jointing material used.
- The surface exhibits signs of wear after cleaning attempts.
Professionals possess the expertise to accurately assess the condition of your jointing material, recommend suitable repairs, and ensure that the integrity of the surrounding structure is preserved. They can also provide guidance on maintenance practices to prevent future issues.
| Signs Indicating Professional Help Needed | Actions to Take |
|---|---|
| Visible cracks or gaps | Contact a masonry specialist |
| Flaking or crumbling | Request a comprehensive assessment |
| Water leakage | Schedule urgent repairs |
| Inconsistent appearance after cleaning | Seek advice on proper restoration techniques |
In my experience, timely professional intervention often results in more successful outcomes than prolonged attempts at DIY fixes. It saves time, resources, and potential future headaches.
FAQ:
Can using a pressure washer damage the mortar between bricks?
Yes, using a pressure washer can potentially damage the mortar between bricks. The high pressure of the water can erode the mortar, especially if it is already weak or deteriorating. It is important to use a lower pressure setting and keep the nozzle at a safe distance from the surface to minimise the risk of damage.
What pressure setting should I use to clean brickwork without harming the mortar?
To clean brickwork without harming the mortar, it is advisable to use a pressure setting of around 1000 to 1500 PSI. This range is usually effective for removing dirt and grime without causing significant damage to the mortar. Additionally, maintaining a distance of at least 12 inches from the surface can help protect the mortar from excessive pressure.
How can I tell if my mortar is too weak to withstand pressure washing?
To determine if your mortar is too weak for pressure washing, check for cracks, crumbling, or discolouration. If the mortar is easily crumbled or if it has significant wear, it may not withstand the force of a pressure washer. Conducting a simple test by applying gentle pressure with a tool can also help assess its integrity; if it breaks easily, it is likely too weak for pressure washing.
Are there alternatives to pressure washing for cleaning brickwork?
Yes, there are several alternatives to pressure washing for cleaning brickwork. One option is to use a soft brush and a mixture of water and mild detergent to scrub the bricks and mortar. Another method is to use a garden hose with a spray nozzle set to a gentle spray. For tougher stains, a solution containing vinegar or baking soda can be applied, followed by scrubbing with a brush. These methods are less likely to damage the mortar.
What should I do if I accidentally damage the mortar while pressure washing?
If you accidentally damage the mortar while pressure washing, the first step is to assess the extent of the damage. If the mortar is crumbling or has significant cracks, it may need to be repaired. You can fill small cracks with a mortar repair compound, but for larger areas, it may be best to consult a professional for proper repointing. Always ensure that the surrounding bricks are cleaned carefully to prevent further damage during the repair process.
.jpg)


