
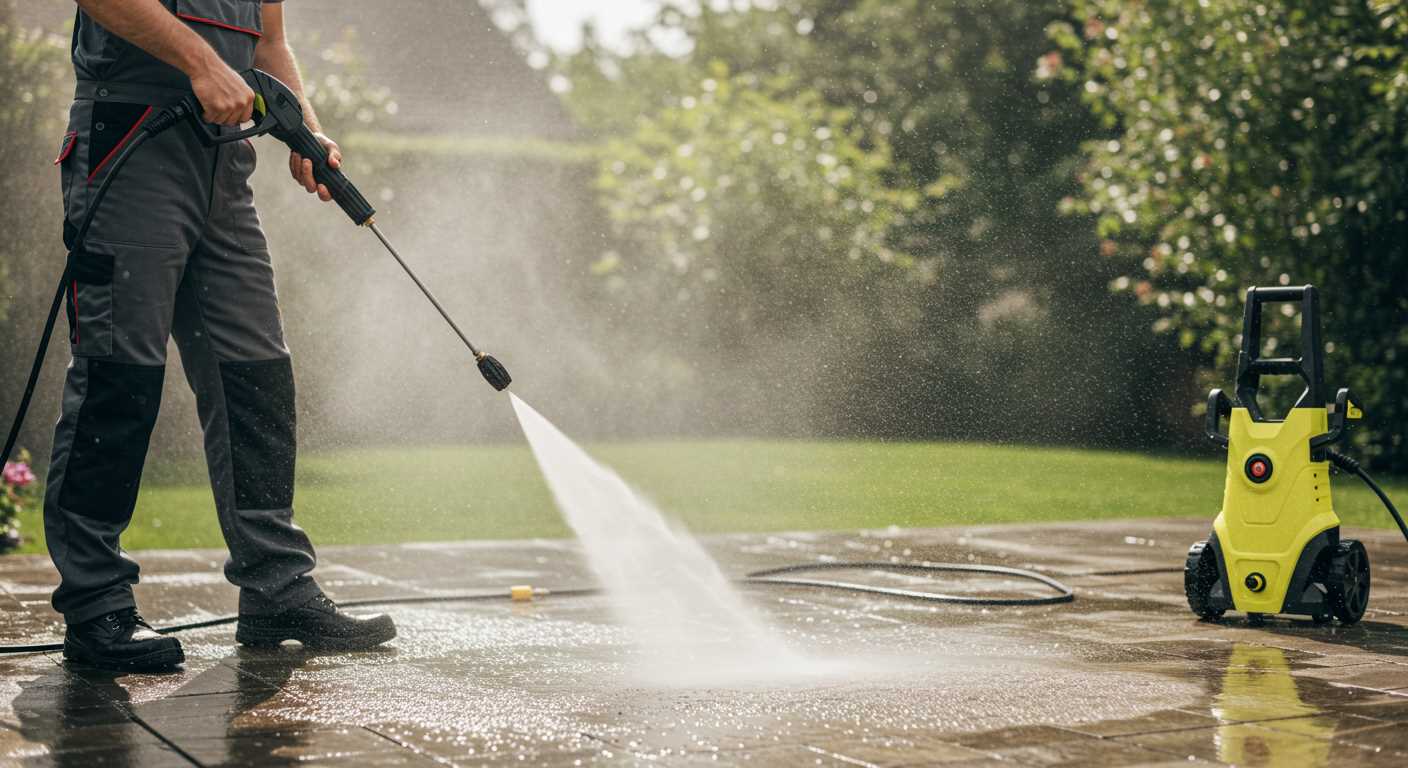


To replenish the reservoir of your high-pressure cleaning device, ensure the unit is powered off and disconnected from any electrical source. This is a critical safety measure that should never be overlooked. Locate the water inlet, which is typically situated at the rear or side of the machine, marked clearly for easy access.
Using a garden hose, connect it securely to the inlet. It’s best to use a hose with a maximum pressure of 4 bar to avoid damaging the internal components. Once connected, turn on the water supply, allowing the unit to fill until the tank reaches the recommended level, often indicated by a visible marker or gauge.

After filling, check for any leaks around the connections. If everything appears secure, proceed to reconnect the power supply and start the device. Always refer to the manufacturer’s manual for specific instructions regarding your model, as variations in design may affect the filling process.
From personal experience, I’ve encountered many models that have unique quirks during the refilling process. Some require a specific order of operations, while others may need a few moments to prime the pump. Familiarising yourself with your particular unit will enhance the overall experience, ensuring optimal performance every time.
How to Properly Prepare Your Kärcher Device
Begin with ensuring the water supply is turned on. A steady flow is crucial to avoid any interruptions during operation. Next, locate the water inlet on the unit. This is typically situated near the base, identifiable by its distinct shape for connection purposes.
Attach a suitable garden hose to the inlet, ensuring a tight connection to prevent leaks. Make certain the hose is free from kinks and blockages. If using a quick coupling, check that it clicks securely into place. Once connected, run water through the hose for a few seconds to flush out any debris that may have accumulated.
Inspect the filter at the inlet. A clean filter is key to optimum performance. If any dirt or particles are present, remove and rinse it under clean water before reassembling. This simple step can extend the life of the appliance significantly.
After confirming that everything is connected properly, turn the machine on while keeping the spray gun trigger closed. Allow the unit to prime, which typically takes only a moment. You will notice the motor start to operate and water flowing through the system.
Once primed, open the trigger on the spray gun to release any trapped air. This ensures consistent pressure and flow. At this point, you’re ready to commence your cleaning tasks effectively.
Regular maintenance checks on the water inlet and filter will enhance longevity and prevent future issues. Keeping all components clean and functional is paramount for achieving the best results with your cleaning equipment.
Understanding the Water Supply Requirements
Ensure a minimum water flow rate of 7-8 litres per minute for optimal performance. Insufficient flow can lead to overheating and damage to the unit. I remember a time when I tested a model with subpar water supply; it shut down repeatedly due to inadequate input. Always check the specifications provided by the manufacturer for any specific requirements.
The water source should be clean and free from debris. During one of my evaluations, I encountered a situation where sediment caused blockages, resulting in reduced pressure and efficiency. Installing a filter can help maintain the integrity of the internal components.
Temperature is another critical factor. Water should be below 50°C. Using excessively hot water can compromise seals and hoses. I once mistakenly connected a unit to a hot water supply, and the damage was immediate. Regular maintenance checks can prevent such mishaps.
Positioning the water source matters too. If the unit is higher than the water source, a gravity feed may not be effective. I’ve seen setups where users had to elevate their water tanks to ensure a consistent flow, which can be a hassle. A direct connection to a tap is often the best method.
Pressure levels in the water supply must also be considered. Ideally, aim for a pressure between 1-10 bar. I recall a project where a low-pressure line caused the machine to underperform significantly. A pressure gauge can be a handy tool to monitor this aspect.
Lastly, using a hose with the appropriate diameter helps maintain flow without restrictions. A hose that’s too narrow can create bottlenecks, affecting performance. I’ve had instances where switching to a wider diameter hose made a noticeable difference in output. Always keep these factors in mind for a seamless experience with your cleaning equipment.
Preparing the Equipment for Filling
Before introducing water into the unit, check the water inlet filter. Remove it and clear any debris or sediment. A clean filter ensures optimal performance and prevents clogs. It’s a straightforward task that can save a lot of hassle later.
Checking Hoses and Connections
Inspect all hoses for kinks or damages. Ensure that the connections are tight and secure. Any leaks can affect the operation, reducing efficiency. A quick visual inspection goes a long way in avoiding surprises.
Positioning the Unit
Place the machine on a stable, level surface. This prevents any accidental tipping during operation. Ensure that the inlet is accessible for easy water connection. Keeping everything tidy makes the filling process smoother.
Lastly, ensure that the water source is turned off until ready to begin. This avoids any unwanted spills and makes the process cleaner. Taking these steps lays a solid foundation for effective use of the equipment.
Locating the Water Inlet and Hose Connection
First, identify the water inlet, typically positioned at the rear or side of the unit. This is where the garden hose attaches for water supply. The inlet is usually a threaded connection, allowing for secure fastening to avoid leaks. Ensure the hose is compatible with the inlet size.
Steps to Locate the Inlet
- Check the user manual for specific diagrams that highlight the location.
- Look for a prominent opening, often marked with a water symbol.
- Inspect the casing for any removable covers that may conceal the inlet.
Hose Connection Tips
- Before connecting, ensure the garden hose is free from kinks and blockages.
- Attach the hose firmly to prevent air from entering the system, which can affect performance.
- If using a quick-connect hose fitting, make sure it clicks into place securely.
Once the water inlet is located and the hose is attached, check for any leaks before starting. A tight connection guarantees a steady flow and optimal functioning of the equipment. Always remember to turn on the water supply before powering up the unit.
Filling the Water Reservoir
Always ensure the reservoir is adequately filled before starting any cleaning task. Open the water inlet cap and insert the hose, allowing water to flow until it reaches the maximum level indicated inside the tank. Check for leaks around the inlet during this process. If you notice any, it’s best to rectify them before proceeding.
Water Quality Considerations
Utilise clean, fresh water to maintain optimal performance. Avoid using water with excessive minerals or chemicals, as this can damage internal components and degrade efficiency. If you have concerns about water quality, consider using a filtration system similar to what’s recommended for how to clean an aquarium air stone.
Final Checks Before Operation
Once filled, secure the cap tightly and inspect all connections. Ensure the hose is firmly attached to the inlet and that the other end is connected to a reliable water source. A steady supply is key, especially for those needing a 4gpm pressure washer. After confirming everything is secure, you’re ready to commence your cleaning projects with confidence.
Checking for Proper Water Flow and Leaks
Ensure an uninterrupted water supply by examining the hose and connections for any signs of wear or damage. A reliable flow is fundamental to optimal functioning. Begin by inspecting the inlet hose. Look for kinks or bends that may restrict water movement. If any are found, straighten them out.
Next, check for leaks at all connection points. A simple trick is to turn on the water supply without activating the machine. Observe for any drips or sprays. If leaks are detected, tighten the fittings or replace faulty hoses. Using plumber’s tape on threaded connections can help create a watertight seal.
Testing Water Flow
After addressing any leaks, it’s time to assess the water flow. With the water supply on, let it run for a few minutes. A steady stream without interruptions indicates good flow. If the flow appears weak or erratic, the supply may be inadequate, or there could be blockages in the hose or inlet filter.
Common Issues and Solutions
| Issue | Possible Cause | Solution |
|---|---|---|
| Poor water flow | Kinked hose | Straighten hose |
| Leaks | Loose connections | Tighten fittings |
| Weak flow | Blockage in hose | Inspect and clear hose |
| No flow | Closed valve | Open water supply valve |
Regular checks for flow and leaks not only prolong the life of the equipment but also ensure peak performance during use. A few minutes spent on these inspections can save significant time and effort later.
.jpg)
.jpg)


