


For those facing an unwelcome colony on their property, a power cleaner can be a surprisingly effective tool. Over the years, I’ve encountered numerous situations where these devices proved invaluable. One memorable instance involved a stubborn colony nestled in the eaves of a garage. Armed with my trusty power cleaner, I approached the task with caution and a well-thought-out strategy.
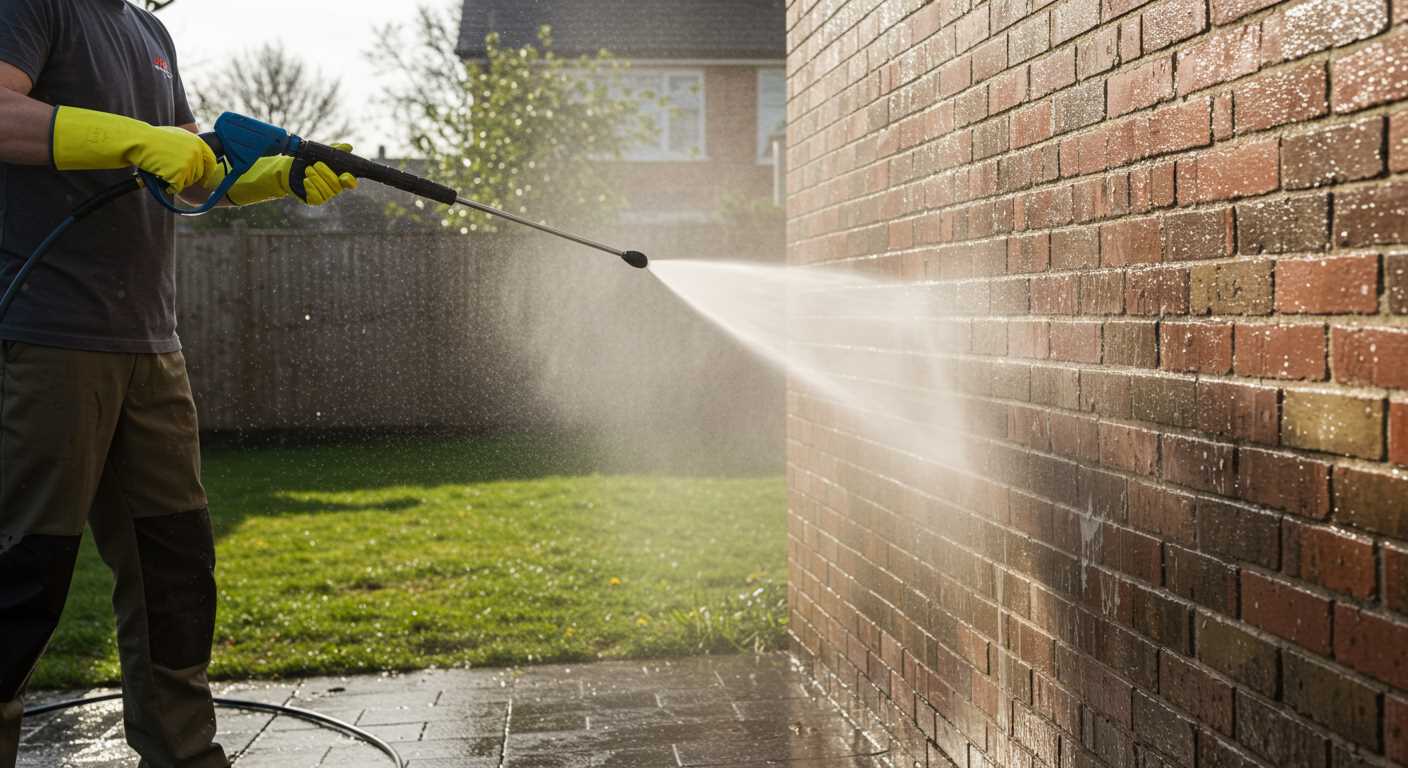
Prior to commencing, safety measures are paramount. Protective gear such as gloves, goggles, and a long-sleeved shirt are non-negotiable. It’s crucial to equip yourself properly to prevent stings. On that occasion, I opted for a low-pressure setting to avoid agitating the insects too much initially. This decision made all the difference, allowing me to assess the situation without drawing too much attention.
As I targeted the abode, I found that positioning the nozzle at an angle was key. This method allowed the powerful stream to dislodge the structure without directly confronting the insects. I moved slowly, ensuring I had an escape route in case they became aggressive. Within moments, the once-stable structure began to disintegrate, and I could see the colony retreating.
After the initial attack, I didn’t simply walk away. Follow-up is essential. I returned later to clean the area thoroughly, ensuring no remnants remained to attract other pests. The satisfaction of seeing the area free from the colony was a rewarding conclusion to a task that many might dread tackling. With the right tools and precautions, this challenge can be managed effectively.
Steps to Eliminate a Wasp Abode with a High-Pressure Cleaner
First and foremost, ensure you’re equipped with the right gear. Safety goggles, gloves, and long sleeves are non-negotiable. A high-pressure model with a nozzle that allows for a concentrated stream is ideal.
Here’s the process I’ve found to be most effective:
- Timing: Early morning or late evening is best, as the insects are less active during these times.
- Preparation: Clear the area around the structure. Remove any obstacles and ensure there’s a clear escape route for yourself.
- Distance: Stand at least 10-15 feet away from the structure to avoid attracting attention or getting stung.
- Angle: Aim the nozzle upwards at a 45-degree angle to effectively dislodge the colony.
- Technique: Use a sweeping motion, gradually moving closer as you apply force. The goal is to disrupt the construction without triggering a defensive response.
- Follow-up: After the initial blast, observe from a safe distance. If any remain, repeat as necessary.
Throughout my years in this field, I’ve learned that patience is key. If an aggressive reaction occurs, retreat immediately and allow the insects to settle before attempting again. Also, never underestimate the power of a second pass; sometimes it takes a few attempts to fully clear the area.
Lastly, consider preventive measures. After the area is clear, sealing potential entry points around your home can deter future colonies from setting up shop. Regular inspections can help catch any early signs of new inhabitants.
Understanding the Risks of Wasp Nests
Before tackling any approach to eliminate a hive, it’s crucial to evaluate the potential hazards. Here’s what I’ve learned through years of hands-on experience:
- Allergies: A significant portion of the population is allergic to stings. An encounter can lead to severe reactions, including anaphylaxis, which requires immediate medical attention.
- Aggressiveness: Disturbing the colony can provoke the insects. Wasps are territorial and may attack in swarms, heightening the risk of multiple stings.
- Location: Nests situated near high-traffic areas, such as doorways or patios, pose greater dangers. Consider the proximity to children and pets when assessing the risks.
- Structural Damage: Some species can cause damage to structures as they build their hives. Ignoring the presence of a colony can lead to costly repairs.
In my experience, it’s wise to approach any removal method with caution. Always wear protective clothing and consider seeking professional help if the situation appears overwhelming. Remember to inform others nearby about the removal efforts to ensure their safety.
For those interested in safety regulations regarding photography in public venues, check this link: are digital cameras allowed inside the santiago bernabeu.
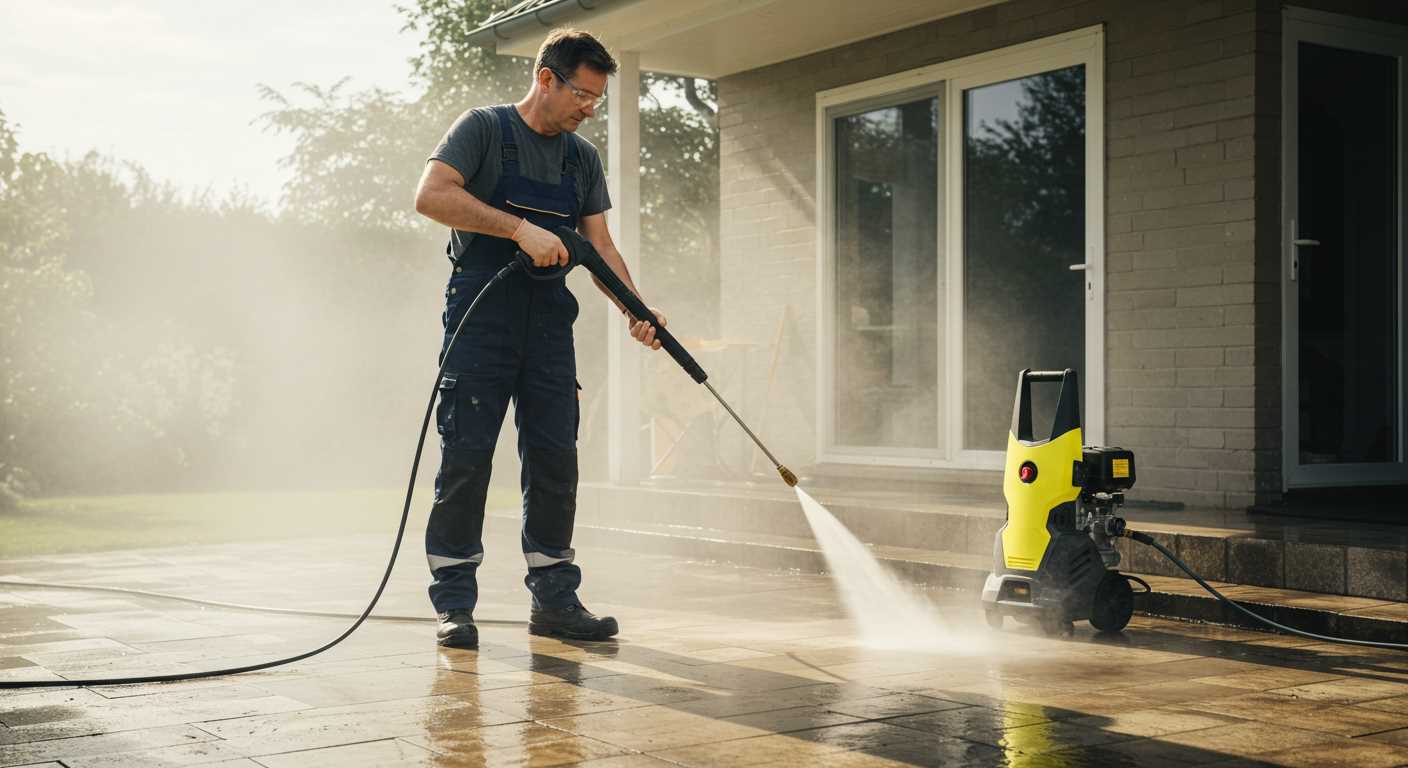
Choosing the Right Pressure Washer for the Job
For effective removal of those unwanted structures, selecting the right model is crucial. From past experiences, I’ve learned that not all machines are created equal. You want something that offers enough power without risking damage to surrounding areas.
First, consider the pressure rating. A unit with at least 2000 PSI will typically provide sufficient force to tackle most outdoor challenges. However, if you’re dealing with particularly stubborn constructions, a model with 3000 PSI might be necessary. Just remember, higher pressure doesn’t always mean better results; precision is key.
Next, focus on the flow rate, measured in gallons per minute (GPM). A higher GPM means more water volume, which aids in dislodging debris and making the task easier. Ideally, look for a machine that offers both a solid PSI and a good GPM for optimal performance.
Consider the type of machine as well. Electric units are quieter and more suitable for smaller tasks, while gas-powered versions often provide more power and mobility for larger works. I recall a time when I opted for an electric model for a bigger job; it struggled to deliver the pressure needed, leading to frustration.
| Feature | Recommended Range |
|---|---|
| Pressure (PSI) | 2000 – 3000 |
| Flow Rate (GPM) | 1.5 – 2.5 |
| Power Source | Gas or Electric |
Additionally, attachments matter. A rotating nozzle can significantly enhance efficiency by increasing the force of the water. I once used a standard nozzle and spent ages without results, but switching to a rotating one made a world of difference.
Lastly, consider weight and portability. If you need to navigate around your property, a lighter model will save you time and energy. Choose one with wheels for easy manoeuvrability. I’ve lugged heavy units around and can assure you that convenience goes a long way.
Safety Gear You Need Before Starting
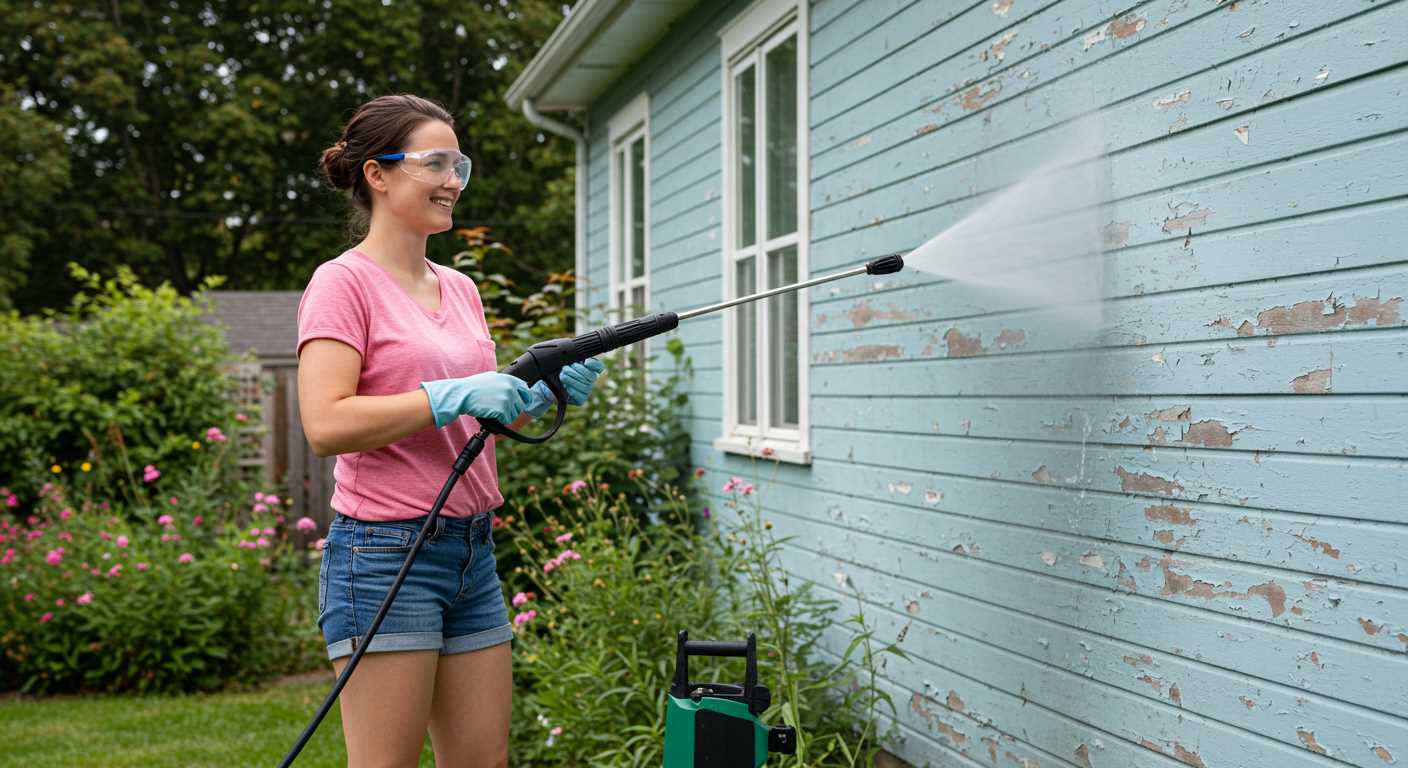
Before tackling the task at hand, equip yourself with the right safety gear. Prioritising your safety can make all the difference. Start with a pair of sturdy gloves. Heavy-duty gloves protect your hands from debris and potential stings. Opt for gloves that are long enough to cover your wrists.
Protective Clothing and Footwear
Wear long-sleeved clothing made of thick fabric to shield your skin from any stray insect encounters. Trousers are a must; shorts leave you exposed. Footwear should be durable and closed-toe; boots provide protection and stability, especially on uneven ground.
<h3 Eye and Face Protection
Goggles or a face shield are non-negotiable. These items prevent insects or debris from entering your eyes, ensuring you maintain clear vision throughout the process. A mask can also be useful, particularly if you’re sensitive to certain chemicals or if debris is kicked up during operation.
Lastly, consider a hard hat if you’re working in an area with overhead risks. Safety is paramount, and taking these precautions will allow you to focus on the task without unnecessary worry.
Preparing the Area Around the Wasp Nest
Before tackling the task, ensure a clear zone around the hive. Remove any outdoor furniture, plant pots, or decorations within a ten-foot radius. This not only protects your belongings but also minimises distractions and potential hiding spots for the insects.
Check for Nearby Structures
Inspect surrounding structures like sheds, garages, or tree branches. These can provide additional access points for the insects. Trim back any overhanging branches and ensure windows and doors are securely shut to prevent uninvited guests during the operation.
Secure Pets and Children
Prioritise safety by moving pets and children indoors. Establish a perimeter to keep them away from the action. Inform neighbours about your plans; they might appreciate the heads-up, especially if they have allergies or sensitivities. Having a lookout can also help monitor the situation while you work.
Adjusting Pressure Settings for Optimal Results
Begin with a lower pressure setting, around 1500 to 2000 PSI, to avoid damaging the surrounding area while still being effective against the target. In my experience, starting too high can lead to collateral damage, such as stripping paint or harming nearby plants. Once you have a grasp of how your equipment handles, gradually increase the pressure if needed.
Utilising a fan tip nozzle is another key aspect. This nozzle disperses the water into a wider spray, reducing the risk of a concentrated blast that could cause injury or damage. I recall a time when I opted for a narrow tip, thinking it would be more effective, and ended up regretting it as debris flew everywhere.
Always test the pressure on a small, inconspicuous area first. This not only helps gauge the effectiveness on the target but also prevents unintended consequences. Adjusting the pressure based on the proximity to the target can also be beneficial. For instance, maintaining a greater distance initially can diffuse the force while still clearing away the unwanted occupants.
It’s essential to monitor the performance continuously. If you notice that the water is not dislodging the target effectively, consider tweaking the settings. Finding that sweet spot takes a bit of trial and error, but it’s worth the effort. For more tips on maintaining control and avoiding damage, check out cleaning the balcony with a pressure washer without collateral damage.
Techniques for Targeting the Wasp Nest
Positioning the spray nozzle at the correct angle is crucial. Aim to hit the base of the structure, where the insects are most active. This will dislodge the nest effectively while minimising the risk of angering the colony. A 25-degree nozzle works well for this task, providing a wide spray that covers more area without losing impact.
Timing is Key
Early morning or late evening is the best time for this operation. During these hours, the majority of the insects are inside, reducing the chances of confrontation. I’ve had instances where waiting until dusk allowed me to complete the task without any interference from the insects. Always observe the activity before proceeding to ensure the timing aligns with their behaviour.
Methodical Approach
Start from a distance of about 10 feet, gradually moving closer as you see the nest begin to break apart. Maintain a steady hand to control the spray pattern and avoid excessive movement, which could draw attention. If you notice any aggressive behaviour, retreat immediately and reassess. It’s better to approach the task methodically than to rush and put yourself at risk.
Post-Removal Cleaning and Inspection Tips
After tackling the removal of that unwanted hive, it’s crucial to clean the area thoroughly. Start by rinsing the site with clean water to eliminate any residual debris or insect remnants. A garden hose is often sufficient for this task, but ensure you apply enough force to wash away all traces.
Inspecting for Recurrent Issues
Once the area is clean, conduct a detailed inspection. Look for any signs of remaining insects or structural damage. Pay close attention to nearby entry points such as cracks or holes in walls, as these can invite new colonies. I recall a time when I overlooked a tiny crack, only to find a new set of intruders a few weeks later. Sealing these gaps with caulk or expanding foam can prevent future infestations.
Maintaining a Pest-Free Environment
To deter any future visitors, consider applying a botanical repellent or insect deterrent around the vicinity. Regularly prune vegetation and keep the area tidy to minimise attractants. During my years in the cleaning equipment industry, I learned that a clean and well-maintained environment is your best defence against unwanted pests.
Lastly, if you feel uncertain about the effectiveness of your efforts, don’t hesitate to reach out to pest control professionals for a second opinion. Taking these steps ensures your space remains inviting and safe.
When to Seek Professional Help
If the hive is particularly large or situated in a challenging location, it’s wise to consult specialists. Their expertise allows them to handle complex situations safely. I recall a time when I attempted to tackle an extensive colony above a porch roof. The angle made it hazardous, and despite my preparation, I realised I should have called for assistance. The professionals arrived equipped with protective gear and tools, ensuring the job was completed efficiently and safely.
Signs You Shouldn’t Go Solo
Visible aggression from the insects is a clear indicator. If they swarm aggressively when approached, it’s best to step back. Another red flag is the presence of multiple hives. Managing several colonies can escalate the risk of stings significantly. Moreover, if you or someone nearby has allergies, seeking help is critical. An allergic reaction can occur swiftly, making the situation potentially life-threatening. In my experience, prioritising safety over DIY ambitions often leads to better outcomes.
Professional Solutions for Persistent Issues
Sometimes, a colony re-establishes itself despite best efforts. Persistent problems indicate a need for expert intervention. These specialists possess techniques and treatments that aren’t available to the average homeowner. I remember a neighbour who faced recurring infestations. After several attempts to eliminate the issue, they hired a pest control service, which ultimately resolved the problem. Their methods not only eradicated the insects but also prevented future occurrences.
FAQ:
Can I safely remove a wasp nest with a pressure washer?
Using a pressure washer to remove a wasp nest is risky and not generally recommended. The high-pressure water can agitate the wasps, increasing the chances of being stung. It’s safer to use other methods, such as insecticides or professional removal services, especially if you’re allergic to wasp stings.
What precautions should I take before using a pressure washer on a wasp nest?
Before attempting to use a pressure washer on a wasp nest, ensure you wear protective clothing, including long sleeves, gloves, and a face mask. It’s also advisable to have a means of escape, such as a clear path to your house, in case the wasps become aggressive. Consider doing this at night when wasps are less active.
Is using a pressure washer the best method for wasp nest removal?
Using a pressure washer is not the best method for wasp nest removal. While it may seem like a quick solution, it can provoke the wasps, leading to a more dangerous situation. Alternatives like insect sprays or hiring a pest control professional are typically more effective and safer.
What should I do if I accidentally disturb the wasp nest while pressure washing?
If you disturb the wasp nest while using a pressure washer, retreat to a safe location as quickly as possible. Wasps may become aggressive and chase you. Once you are safely inside, monitor the situation from a distance. If wasps continue to pose a threat, it may be wise to contact a pest control professional for assistance.
Are there any alternative methods to remove a wasp nest safely?
Yes, there are several alternative methods to remove a wasp nest safely. One option is using a commercial wasp spray designed to kill wasps on contact. Spraying at night when wasps are less active can reduce the risk of stings. Another method is to call in a pest control expert who can safely remove the nest without endangering you or the surrounding area.
Is it safe to use a pressure washer to remove a wasp nest?
Using a pressure washer to remove a wasp nest can be risky. While the high-pressure water can dislodge the nest, it may also agitate the wasps, leading to potential stings. It’s advisable to wear protective clothing and consider using the pressure washer from a safe distance. Additionally, it’s usually better to wait until dusk or early morning when wasps are less active.
.jpg)


