


If your high-pressure cleaner isn’t functioning as expected, the first step is to disconnect it from the power source. This simple action can often solve minor issues. After that, check the water supply and ensure it’s flowing freely. Clogs can occur, especially if the machine has been sitting unused for a while. Clear any debris from the inlet filter, as this can significantly affect performance.
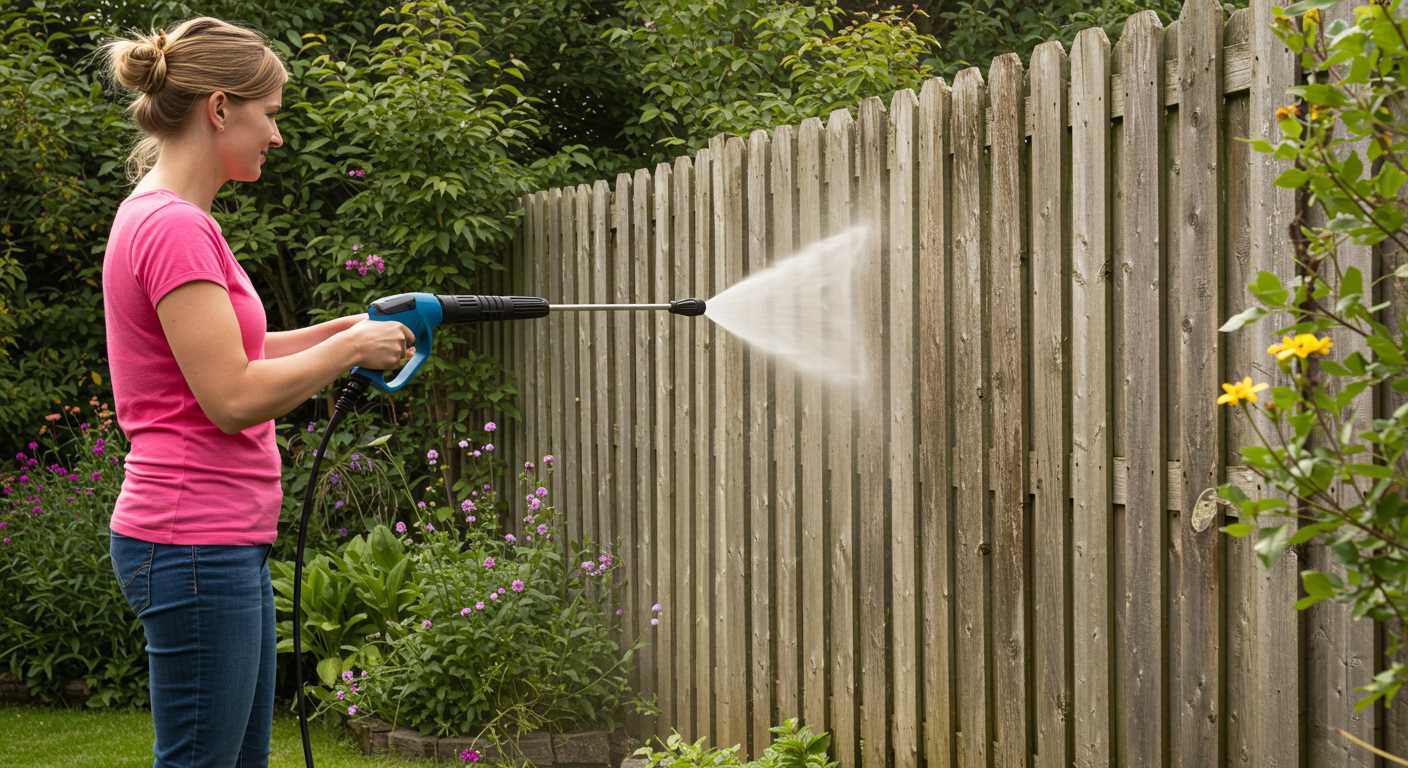
Next, inspect the nozzle and hoses for blockages. A quick rinse can often dislodge any build-up. If the spray pattern appears uneven, it might be time to replace the nozzle, which is a straightforward task. In my experience, keeping spare nozzles on hand has saved me a lot of time and frustration.

Once you’ve ensured everything is clear, reconnect the unit and turn it on. Listen for any unusual sounds, as they can indicate underlying mechanical issues. If the machine still doesn’t operate properly, consider consulting the user manual for troubleshooting tips specific to your model. I’ve often found that a quick review of the manual can provide insights that save time and effort during troubleshooting.
Steps to Restore Your Cleaning Equipment
First, disconnect the power supply to avoid any electrical hazards. Then, locate the circuit breaker on the unit; it’s usually found near the power cord connection. Flip the breaker switch to the off position, then back to on. This often resolves minor electrical issues.
If the machine still doesn’t function properly, examine the garden hose and spray gun for clogs. Remove any debris, and check for kinks in the hose that might restrict water flow. A clear path ensures optimal performance.
Clearing the Nozzle
Next, inspect the nozzle. A blocked nozzle can lead to low pressure or no spray at all. Use a small, pointed object to clear any obstructions. Once cleared, test the spray pattern to ensure it’s functioning correctly.
Final Checks
As a last measure, review the user manual for specific troubleshooting tips relevant to your model. Sometimes, the solution lies within the guidelines provided. If problems persist, it may be time to reach out to a service centre for professional assistance.
Identifying Common Issues Requiring a Reset
Recognising the symptoms of malfunction is critical for an effective resolution. Here are the common problems and their indicators:
- Lack of Pressure: If the output is weak, inspect for clogs in the nozzle or hose. Ensure the water supply is adequate.
- Motor Won’t Start: Check the power source and ensure that connections are secure. A blown fuse or tripped circuit breaker may also be the culprit.
- Frequent Shut-offs: This may indicate overheating. Ensure the unit isn’t obstructed and the cooling vents are free of debris.
- Unusual Sounds: Grinding or rattling noises can signal internal issues. Inspect for loose components or foreign objects in the housing.
- Water Leaks: Inspect all connections and seals. Persistent leaks often mean worn seals that need replacement.
Addressing these issues promptly can prevent further complications and maintain the performance of your equipment. Always consult the manual for specific troubleshooting steps for your model.
Steps to Power Cycle Your Ryobi Pressure Washer
To effectively restart your cleaning equipment, follow these steps:
- Disconnect the unit from the power source. Unplug the electrical cord and ensure the machine is completely powered off.
- Turn off the water supply. This prevents any potential water damage during the process.
- Release any remaining pressure. Press the trigger on the gun to expel water and air, ensuring that the system is not under pressure.
- Wait for a minute. This brief pause allows the internal components to reset.
- Reconnect the power. Plug the cord back into the outlet, ensuring a secure connection.
- Turn on the water supply. Make sure the hose is properly attached and there are no leaks.
- Start the machine. Switch it on and allow it to reach optimal operating conditions.
If you’re tackling stubborn dirt, consider using pressure washer soap for concrete to enhance cleaning efficiency.
These steps can resolve many issues and get your equipment operational again. Regular maintenance checks are also advisable to prolong the lifespan of your machine.
How to Clear the Thermal Relief Valve
Start by locating the thermal relief valve, typically situated near the pump. This valve plays a critical role in protecting the equipment from overheating. If you notice the machine is not functioning correctly, it may be due to this component being activated.
Steps to Clear the Valve
First, ensure the unit is powered off and unplugged. Then, release any built-up pressure by squeezing the trigger on the spray gun until water stops flowing. Once the pressure is gone, look for the valve–it’s usually a small, round device. Gently pull the valve lever or button to allow any trapped water or air to escape. You might hear a slight hiss as the pressure releases.
Testing After Adjustment
After clearing the valve, reattach any components you may have removed. Plug in the unit and turn it on. Test the functionality by squeezing the trigger and observing the water flow. If the issue persists, consider checking for blockages in the hose or nozzle, as they can contribute to overheating and valve activation.
Checking and Restoring Electrical Connections
Inspect all electrical connections for signs of wear or damage. Start by unplugging the unit and examining the power cord for frays or cuts. If you notice any issues, replace the cord to avoid potential hazards. After ensuring the cord is intact, check the connections at the switch and motor. Loose or corroded terminals can interrupt power flow, leading to operational problems.
Testing Connections
Utilise a multimeter to check for continuity at each connection point. Set the multimeter to the resistance setting and place the probes on either side of the connection. A reading close to zero indicates a good connection. If you encounter high resistance or no continuity, clean the terminals with a wire brush or contact cleaner to remove corrosion. Ensure all screws are tightened securely to maintain a solid electrical connection.
Reassembling the Unit
After addressing any electrical issues, reassemble the unit carefully. Double-check all connections before plugging it back in. It’s wise to perform a test run to ensure everything operates smoothly. If the equipment still doesn’t function as expected, consider seeking professional assistance. Regular maintenance of these connections can extend the life of your equipment significantly. For additional upkeep tips, check out this guide on how to clean an aquarium tank.
Resetting the Water Supply System
First, ensure the water source is turned on and properly connected. A common issue I’ve encountered is a kinked or damaged hose, which can inhibit water flow. Inspect the entire length of the hose for any signs of wear or blockage.
If everything appears fine, check the inlet filter. This small component can easily become clogged with debris, impeding water supply. Remove the filter and rinse it under running water to clear out any buildup.
Once the filter is clean, reattach it securely. You might also want to examine the connections between the hose and the unit. Make sure they are tightened and free of leaks.
If water continues to flow improperly, consider running the system without the nozzle attached. This can help clear out any air pockets or blockages in the line. Keep the trigger pulled for a few moments to see if the water pressure stabilises.
After these checks, if issues persist, it might be time to consult the manual for specific troubleshooting steps related to the water supply system. Sometimes, specific models have unique quirks that need addressing.
Testing the Equipment After Reconfiguration
After restoring functionality, it’s essential to conduct a thorough examination of the unit before diving back into your cleaning tasks. Begin by ensuring all connections are secure and water supply is properly established. Once ready, start the machine and observe its performance closely.
Steps for Effective Testing
Follow these steps to ensure everything operates smoothly:
| Step | Description |
|---|---|
| 1 | Turn on the machine and let it run for a few minutes without the nozzle attached. This allows internal components to regulate and stabilise. |
| 2 | Inspect for any unusual noises or vibrations that may indicate issues within the motor or pump. |
| 3 | Reattach the nozzle and select a suitable spray pattern. Test the water flow and pressure to ensure it meets performance standards. |
| 4 | Check for leaks around hoses, fittings, and the unit itself. Any leaks can significantly impact effectiveness. |
| 5 | If everything appears normal, proceed with a small cleaning task to evaluate performance under load. |
Common Indicators of Issues
During testing, be vigilant for signs that may indicate further adjustments are necessary. Look for fluctuating pressure, inconsistent water flow, or any warning lights that may appear on the control panel. If issues arise, further investigation into the water intake system or electrical components may be warranted.
.jpg)

.jpg)


