


For anyone looking to elevate their cleaning routine, incorporating specific solutions directly into your high-pressure cleaning system can yield remarkable results. I’ve spent years experimenting with various mixtures, and I can confidently say that the right combination can transform a tedious chore into a swift and effective task. Always ensure compatibility between your cleaning agent and the equipment; doing so will protect both the machine and surfaces being cleaned.
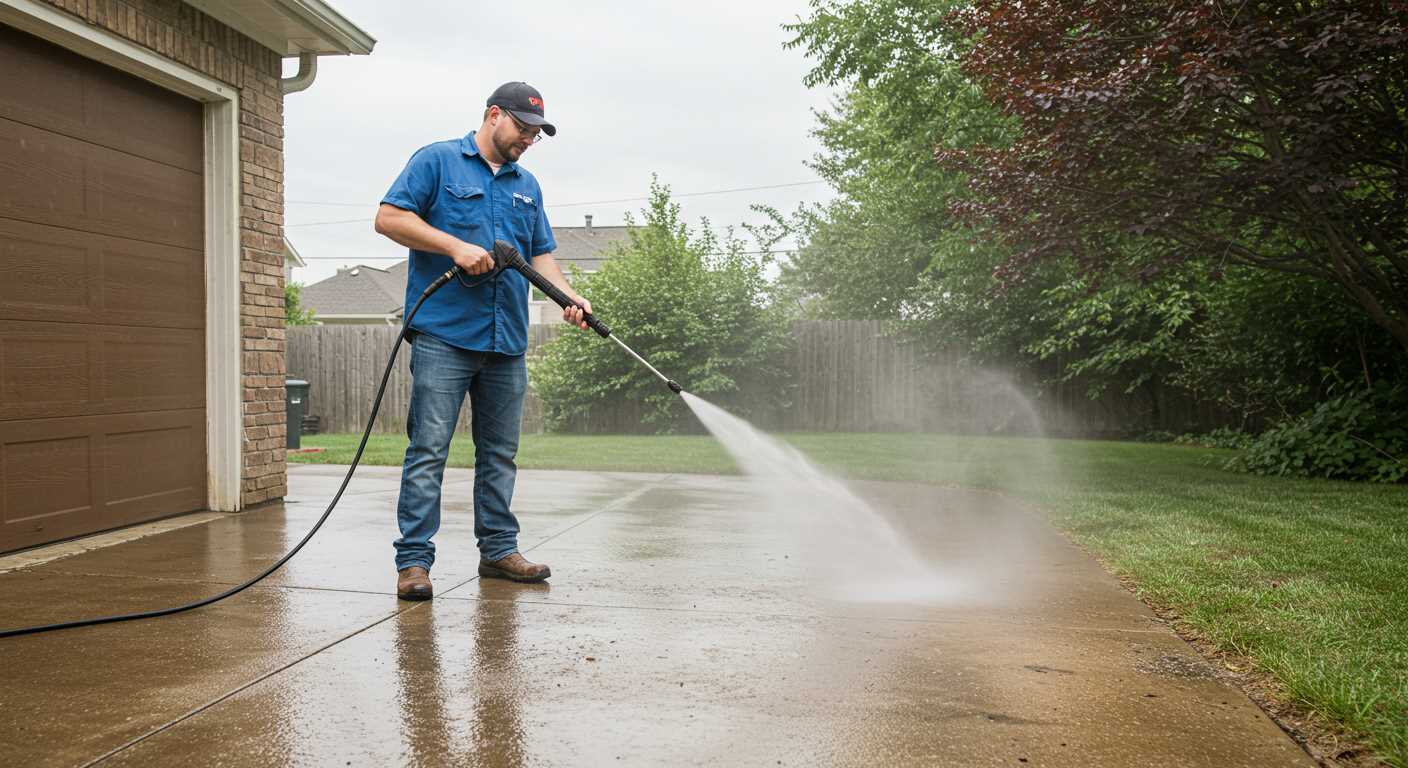
When selecting a liquid, consider the task at hand. For instance, grease and oil stains on driveways vanish almost effortlessly with a degreaser. I recall a particularly challenging job where a client’s patio was marred by years of grime. Using a specially formulated cleaner alongside my equipment, I achieved a pristine finish in less than an hour. Always dilute concentrated solutions according to the manufacturer’s instructions to avoid surface damage.

Another key aspect involves the application method. Using a nozzle designed for chemical application ensures an even distribution, which maximises contact with the surface. I’ve learned that applying too much pressure can lead to overspray and wasted product, so adjusting the pressure settings to suit the solution is vital. After all, it’s about achieving the desired outcome while using the least amount of product necessary.
Lastly, safety cannot be overlooked. Personal protective equipment should always be worn, including gloves and goggles, especially when handling strong formulations. My early days involved a few mishaps, but those experiences taught me the importance of taking proper precautions. Clean smarter, not harder, and you’ll not only save time but also preserve the longevity of your equipment.
Selecting the Right Chemicals for Your Pressure Washer
Choosing the correct solutions can significantly enhance cleaning outcomes. I’ve seen firsthand how specific products yield remarkable results, while others can cause more harm than good. Here’s what I’ve learnt over the years.
- Identify the Surface Type: Different materials require tailored solutions. For instance, a gentle cleaner works best on wooden decks, while concrete surfaces may benefit from a stronger degreaser.
- Read Product Labels: Manufacturers provide vital information. Check for compatibility with your equipment. Some formulations are too harsh and can damage internal components.
- Opt for Eco-Friendly Options: I’ve often used biodegradable products that are safe for the environment. They clean effectively without contributing to pollution.
- Test Before Full Application: Always perform a patch test on a small, inconspicuous area. This helps to avoid unwanted reactions or damage to the surface.
- Concentration Matters: Adhere to the recommended dilution ratios. Over-concentrating can lead to residues that may be difficult to rinse away.
One time, I was cleaning a heavily soiled patio. I opted for a specific formula designed for stone surfaces. The difference was astonishing, lifting years of grime in under an hour. That experience reinforced the importance of selecting the right product.
Additionally, consider seasonal factors. In winter, a solution that prevents freezing is beneficial. For summer, opt for a mild cleaner that can tackle dirt and algae without damaging plants nearby.
Finally, keep in mind the storage of these products. Some formulations can degrade if exposed to extreme temperatures. Store them in a cool, dry place for longevity.
With the right selections, the results can be transformative, making cleaning tasks not just easier but also more satisfying.
Understanding the dilution ratios for cleaning solutions
For optimal results, it’s vital to adhere to the correct dilution ratios when mixing your cleaning solutions. A common guideline is to follow the manufacturer’s recommendations, typically found on the product label. For instance, if a solution suggests a 1:10 ratio, mix one part of the cleaner with ten parts of water. This ensures the cleaning agent maintains its potency while reducing the risk of damage to surfaces.
From my experience, using too concentrated a mix can lead to residue buildup and surface damage. Once, I mistakenly used a stronger solution on a delicate patio surface, resulting in discolouration. Learning from that, I now always double-check the recommended ratios. Conversely, a too-diluted mixture may not effectively remove stubborn stains or grime, which defeats the purpose of the task.
When dealing with various materials, such as wood or metal, different ratios may apply. For instance, wood surfaces often require a gentler approach to prevent warping. A typical dilution might be around 1:20. I remember cleaning my wooden deck and following this ratio resulted in a clean finish without any damage.
Additionally, always mix solutions in a separate container instead of the main tank to avoid contamination. This practice not only protects your equipment but also allows you to adjust the mixture easily if you find it too strong or weak. If you’re ever in doubt about the right mix, researching or referring to guides specific to your task can be beneficial. If you’re interested in cleaning techniques, you might find this link useful: how to clean laminate wood floors steam mop.
Finally, remember that environmental factors, such as temperature and surface type, can also influence the effectiveness of your solution. On hot days, a more diluted mixture might be necessary as the solution can dry quickly, leaving streaks. Adjusting the ratios based on these conditions can help achieve the best cleaning results without risking damage.
Loading solutions into your cleaning equipment correctly
.jpg "How to use chemicals with pressure washer")
First, ensure your machine is turned off and disconnected from the power source before handling any liquids. I’ve seen too many cases where mishaps happen simply because someone rushed this step. Start by locating the detergent tank, typically found near the base or on the side of the unit.
Pour the prepared mixture into the tank, using a funnel to prevent spills. I recall a time when I neglected this simple tool and ended up with a sticky mess–all over my garage floor. Always check your manufacturer’s guidelines for the maximum fill line to avoid overloading the tank, which can lead to leaks or poor performance.
If your model doesn’t have a built-in tank, opt for a siphon tube. Insert the tube into the container holding your solution, ensuring it’s submerged adequately. Avoid using extremely thick mixtures as they can clog the tube and hinder flow. I learned this lesson the hard way when I attempted to use a gel-like product, which left my equipment non-functional for a weekend.
After loading, securely close the tank cap or ensure the siphon connection is tight. This prevents any leakage while in operation, which could damage the machine. I’ve experienced the frustration of losing valuable cleaning time due to preventable spills.
Lastly, always rinse the tank and any connecting tubes with clean water after use. This practice extends the life of your equipment and maintains optimal performance. I can’t stress enough how a simple rinse can save you headaches down the line. Regular maintenance is key to keeping everything running smoothly.
Choosing the Appropriate Nozzle for Chemical Application
Selecting the right nozzle is critical for achieving optimal results when applying cleaning solutions. Based on my experience, I often recommend using a low-pressure nozzle, such as a soap nozzle, which typically has a wider spray pattern. This allows the solution to cover surfaces evenly without causing damage.
Understanding Nozzle Types
Soap nozzles usually have a 40-degree spray angle, making them ideal for distributing chemicals over large areas. In contrast, a zero-degree nozzle provides a concentrated stream that can damage surfaces and is not suitable for this purpose. I’ve seen customers struggle with using the wrong nozzle, resulting in streaky applications or, worse, surface abrasion.
Adjusting Pressure for Optimal Application
In addition to using the correct nozzle type, adjusting the pressure settings on your machine can enhance the application process. Lower pressure ensures that the solution adheres longer to the surface, allowing for better penetration and cleaning. I recall a time when I was cleaning a heavily soiled driveway; switching to a lower pressure setting while using the soap nozzle made a noticeable difference in how the cleaner worked.
Applying chemicals safely to avoid damage
Always conduct a patch test on a small, inconspicuous area before applying any solution broadly. I once had a client who used a strong cleaner on their patio, only to find it discoloured the stone. A simple test could have saved a lot of headaches.
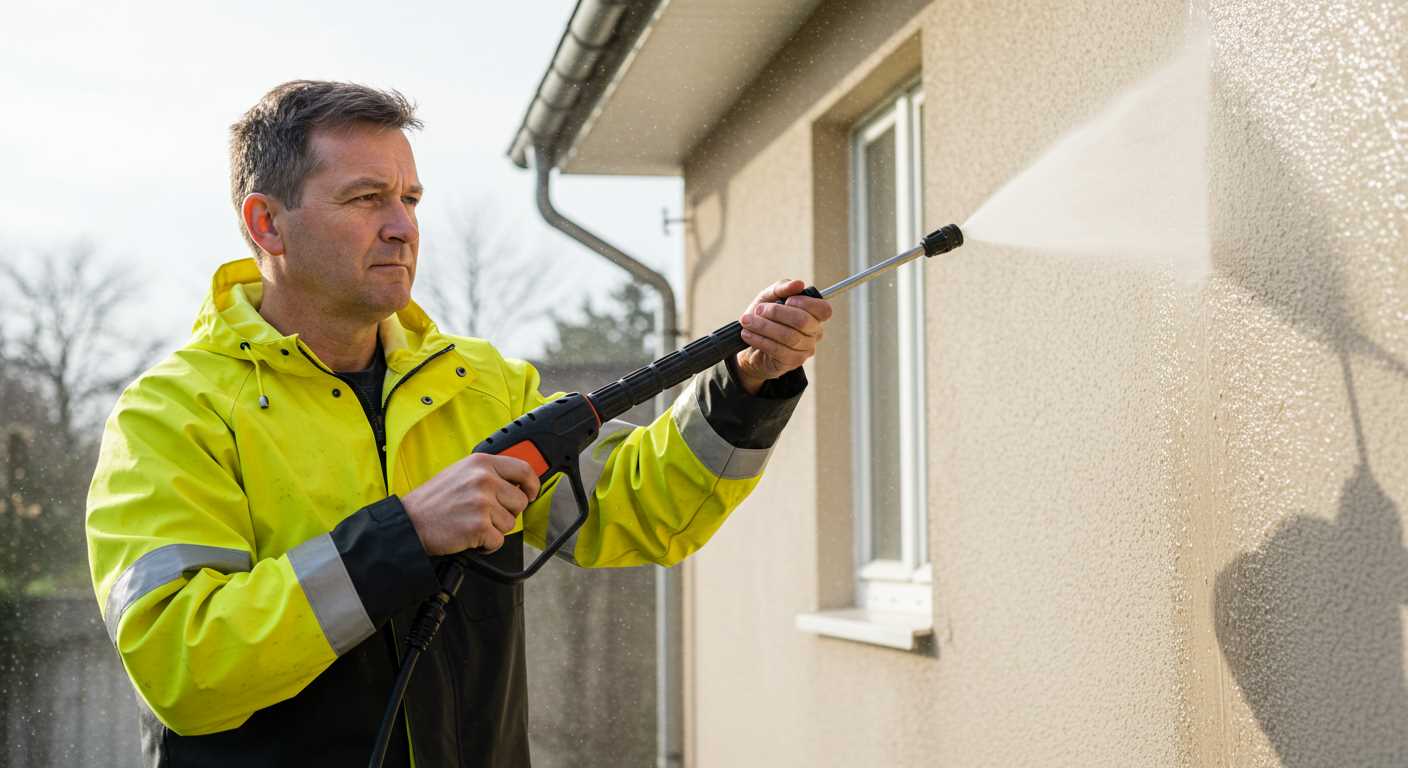
Protective gear is a must
Wear gloves, goggles, and a mask. While the products may seem harmless, prolonged exposure can lead to skin irritation or respiratory issues. I’ve seen too many instances where a lack of protective equipment resulted in discomfort for the user. Invest in quality gear to safeguard yourself.
Rinse thoroughly
After application, ensure to rinse surfaces thoroughly. I recall an incident where a customer didn’t rinse a solution off their car properly, leading to paint damage. A proper rinse not only protects the surface but also prevents residue buildup that could attract dirt and grime. Take the time to do it right; it pays off in the long run.
Timing Your Chemical Application for Optimal Results
Apply your cleaning solutions during optimal conditions for the best outcomes. I’ve found that the ideal time is early in the morning or late in the afternoon, avoiding the harsh midday sun. The heat can cause solutions to dry too quickly, preventing effective penetration and removal of grime.
Consider the temperature of the surface you’re treating. If it’s too hot, the solution won’t adhere well, leading to uneven cleaning. I remember trying to tackle a particularly dirty patio on a sweltering day, only to find that the cleaner evaporated almost as soon as it hit the surface. Lesson learned!
Humidity plays a significant role as well. Higher humidity levels can enhance the effectiveness of certain formulations, allowing them to work more efficiently. I’ve had success applying solutions during slightly overcast days, where the moisture in the air seemed to boost performance.
Timing isn’t just about the weather. Allow the cleaner to dwell on the surface for the recommended period specified by the manufacturer. I often set a timer to ensure I don’t rush the process. For instance, I once neglected this step and ended up with streaks on a driveway that required a second application.
Table 1 below summarises the key factors to consider for timing your application:
| Factor | Recommended Timing |
|---|---|
| Time of Day | Early morning or late afternoon |
| Surface Temperature | Avoid hot surfaces |
| Humidity | Higher humidity enhances effectiveness |
| Dwell Time | Follow manufacturer’s recommendations |
Incorporating these timing strategies into your routine will significantly improve the efficacy of your cleaning efforts. I’ve witnessed the difference it makes firsthand, and it’s always rewarding to see the results of a well-timed application.
Flushing Your Equipment After Chemical Application
After applying a cleaning solution, it’s vital to thoroughly flush the system to prevent residue build-up and potential damage. Begin by filling the tank with clean water. Start the motor and let the water circulate through the lines for about 5 to 10 minutes. This process removes most of the remaining solution.
Steps for Effective Flushing
- Ensure the machine is off before switching to water.
- Attach the water source directly to the inlet or use a dedicated flushing port if available.
- Run the unit at low pressure to allow water to flow smoothly without creating excessive strain.
- Monitor the discharge for any signs of discolouration or foam, indicating residual cleaning agents.
Post-Flushing Maintenance
- After flushing, inspect all hoses and connectors for any signs of wear or chemical damage.
- Clean the nozzle tips to ensure optimal performance during the next use.
- Store the unit in a clean, dry place to prevent contamination from external elements.
Personally, I’ve seen units fail prematurely due to neglecting this crucial step. A simple flush can save you from costly repairs and ensure the longevity of your equipment. Always make this a part of your routine after any cleaning session involving solutions.
Storing Solutions Properly to Maintain Effectiveness
For optimal performance, store your cleaning substances in a cool, dry place away from direct sunlight. I recall one summer, I left a few bottles in my garage, and the heat caused them to degrade rapidly. The efficacy dropped significantly, resulting in wasted time and effort on my part.
Containers Matter
Always use original containers or high-quality, chemical-resistant bottles. I once transferred a solution into a non-resistant container, which led to a dangerous reaction and a messy clean-up. Make sure the lids are tightly sealed to prevent evaporation or contamination.
Label Everything
Clearly label each container with the contents and any safety warnings. I’ve seen colleagues confused by unlabeled products, leading to incorrect usage. This simple step not only keeps everything organised but also ensures safety during application.
For more insights on selecting reliable equipment, check out my guide to finding the highest rated pressure cleaner pumps.

.jpg)


