


For anyone seeking to elevate their outdoor cleaning tasks, pairing a foaming accessory with an economical washer can yield impressive results. This combination not only enhances the cleaning power but also adds a layer of convenience to the process. I recall my first experience using a similar setup; the difference was immediately noticeable. The thick layer of suds clung to surfaces, breaking down grime effortlessly.
Connecting the foaming device to your unit is a straightforward process. First, ensure you have the correct adapter for a snug fit, as this will prevent leaks and maximise performance. Once connected, fill the reservoir with a quality detergent–opting for one that’s compatible with your specific cleaning needs ensures optimal results. In my experience, a dedicated car shampoo works wonders on vehicles, while a robust cleaner is ideal for patios and driveways.

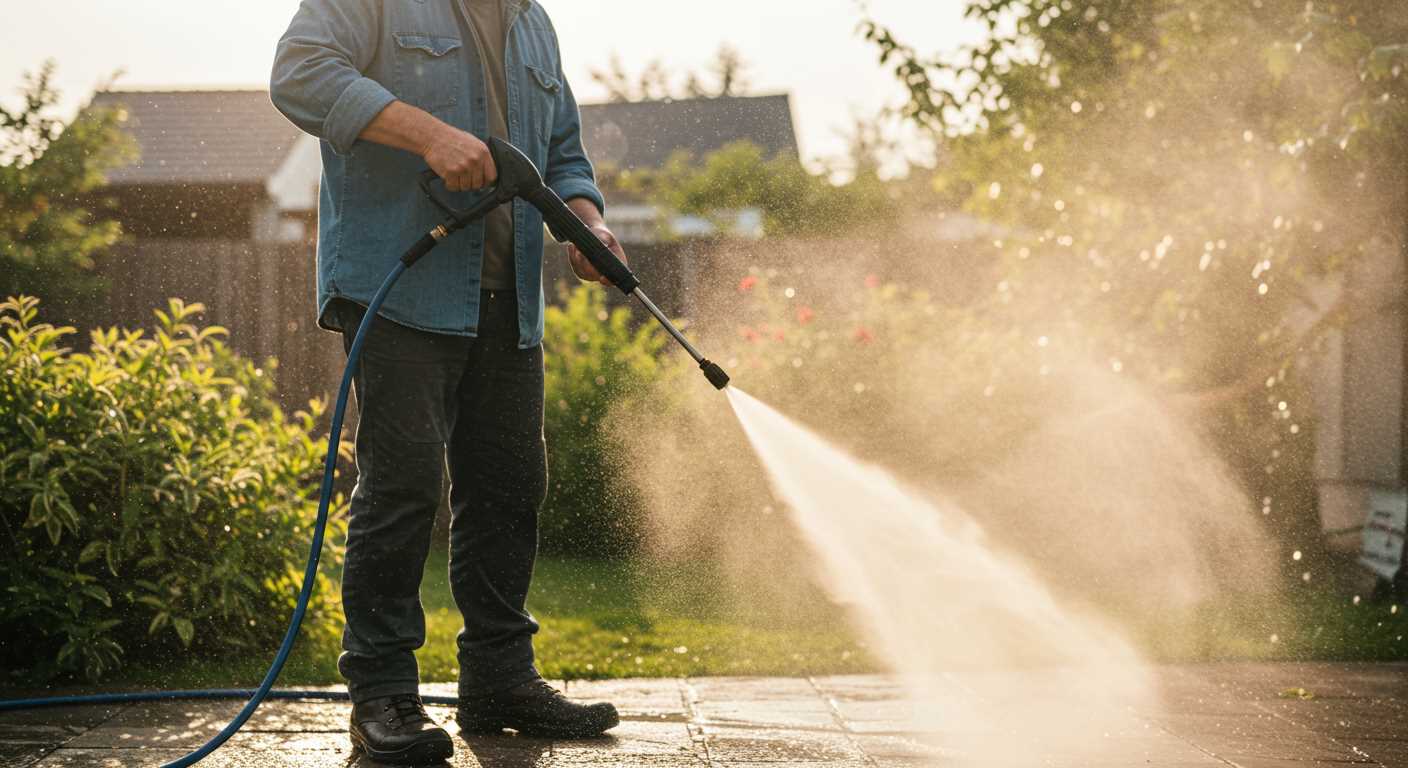
Adjusting the nozzle to achieve the desired spray pattern is critical. A wide fan for larger areas allows for quicker coverage, while a more focused stream is perfect for stubborn spots. During my testing, I found that experimenting with different settings can lead to a better understanding of what works best for various surfaces. Remember, patience is key; allowing the foam to dwell for a few minutes can significantly enhance cleaning efficacy.
Lastly, always rinse thoroughly to remove any residual detergent. This step not only prevents streaking but also protects your surfaces from potential damage. From my years of testing various combinations, I can confidently say that this method transforms routine cleaning into an enjoyable and satisfying task.
Choosing the Right Karcher Foam Gun for Your Pressure Washer
For optimal performance, select a foam dispenser that matches the specifications of your cleaning machine. I’ve tried numerous models, and one that stands out is the Karcher FJ 6. It’s compatible with various devices and delivers excellent coverage.
Check the connection type on your unit. Most Karcher models use a bayonet fitting, while others may require an adapter for seamless attachment. Always confirm compatibility before purchasing.
Pay attention to the foam generation capability. Some variants produce thicker suds, ideal for tackling stubborn grime, while others focus on rinsing. I’ve found that a thicker foam clings better, allowing for longer dwell time on surfaces.
Consider the tank size as well. A larger reservoir means fewer refills during extensive cleaning tasks. I once used a smaller model and ended up stopping frequently, which slowed down the process significantly.
Lastly, assess the price-to-performance ratio. Investing in a quality dispenser can save you time and effort in the long run. I learned this the hard way after opting for a cheaper alternative that simply didn’t deliver the desired results.
Connecting the Foam Accessory to Your Aldi High-Pressure Cleaner
Begin by ensuring you have the correct adapter to fit the foam attachment onto your Aldi cleaning machine. Most models come with a standard connector, but verify compatibility before proceeding.
Steps to Connect
.jpg "How to use karcher foam gun with aldi pressure washer")
- Turn off your device and unplug it for safety.
- Remove the standard nozzle from the lance. This typically involves unscrewing it or pulling it off, depending on the design.
- Take your foam accessory and align it with the lance. Ensure the connector is properly seated.
- Secure the connection by twisting or locking it into place. You should hear a click or feel it lock to confirm it’s secure.
- Attach the detergent bottle to the foam accessory, ensuring it’s tightly sealed to prevent leaks.
Testing the Connection
Before you start cleaning, perform a quick test:
- Plug your machine back in and turn it on.
- Adjust the pressure settings to a lower level to start.
- Activate the trigger to check for any leaks around the connection. If you see any detergent leaking, recheck the seals and tighten as necessary.
If you’re looking to enhance your cleaning routine, consider checking out additional resources. For instance, if you have pets, understanding safety measures like can an electric fence kill a small dog can be crucial.
After confirming everything is tight and leak-free, you’re ready to begin your cleaning task efficiently. Enjoy the process of transforming your surfaces with ease!
Selecting the Appropriate Foam Solution for Cleaning
Choosing the right cleaning solution is crucial for achieving optimal results. Not all detergents are created equal, and their effectiveness can vary based on the surface being cleaned. I’ve experimented with a wide range of products over the years, and here are my recommendations.
First, consider the type of grime you’re dealing with. For vehicles, a pH-neutral shampoo is ideal. It cleans effectively without damaging the paintwork or any wax layers. For tougher stains, such as oil or grease, a heavy-duty degreaser works wonders. Just ensure it’s compatible with the equipment you’re using.
For outdoor surfaces like patios and driveways, look for solutions specifically formulated to combat mould and mildew. These products often contain biocides that help prevent future growth, keeping surfaces cleaner for longer. I’ve found that a concentrated cleaner, diluted according to the manufacturer’s instructions, can provide impressive results.
To make the right choice, always check the label for compatibility with your equipment. Some cleaners may foam excessively, which can lead to clogging or other issues. Here’s a quick comparison table to help you decide:
| Surface Type | Recommended Cleaner | Notes |
|---|---|---|
| Vehicles | pH-neutral shampoo | Safe for paint and wax |
| Concrete Driveways | Mould and mildew remover | Prevents future growth |
| Patios | Heavy-duty degreaser | Effective on oil and grime |
| Wood Surfaces | Wood cleaner | Protects finish and grain |
My advice? Always test a small, inconspicuous area first. This way, you can ensure the cleaner won’t cause any damage. I learned this the hard way during a project where I used a strong cleaner on a delicate surface, resulting in unexpected discolouration.
Finally, consider the environment. Many brands now offer eco-friendly options that are just as effective but less harmful to nature. Using biodegradable solutions not only helps the planet but also reflects positively on you as a responsible cleaning enthusiast.
Adjusting Foam Thickness for Optimal Coverage
To achieve the best results, calibrating the thickness of the suds is essential. I’ve found that the right consistency can significantly impact cleaning performance. Start by adjusting the dial on the nozzle. A lower setting typically produces a thicker lather, which clings better to surfaces, while a higher setting yields a lighter foam that covers larger areas quickly.
- For intricate areas like wheel arches or grilles, aim for a denser foam. This allows the cleaner to penetrate grime effectively.
- For broad surfaces, such as car bodywork, a lighter mix can help ensure even distribution and quicker rinsing.
Experimenting with different mixtures will help you find the sweet spot. I remember a time when I adjusted the foam thickness for a particularly dirty vehicle. By dialling it down, I achieved a rich, thick foam that clung to the surfaces, allowing the detergent to work its magic before rinsing.
Additionally, consider the cleaning solution’s viscosity. Thicker liquids may require more dilution to achieve the desired foam consistency. Always check your product instructions for guidance on mixing ratios.
Combining the right thickness with an adjustable pressure washer nozzle can enhance your results. This flexibility allows you to switch between foam thicknesses depending on your cleaning needs, ensuring optimal coverage every time.
Remember, achieving the perfect foam is about trial and error. Don’t hesitate to test different settings until you find what works best for your specific cleaning tasks.
Techniques for Applying Foam on Different Surfaces
For vehicles, a pre-soak is key. Start from the bottom and work your way up to avoid streaks. Use a sweeping motion to ensure even coverage. Let the solution dwell for a few minutes before rinsing to break down dirt and grime effectively.

On delicate surfaces like glass, adjust the dilution ratio to prevent spotting. Apply in a horizontal pattern, overlapping slightly to ensure no area is left untreated. This approach helps maintain clarity and avoids water spots after rinsing.
When tackling painted surfaces, ensure the solution is applied with a gentle touch. Use a medium foam thickness to allow it to cling without running off too quickly. This ensures maximum dwell time, allowing the cleaning agents to penetrate the contaminants.
For textured surfaces, like non-slip patios, a thicker application works wonders. The foam should fill in the grooves and crevices, allowing for deeper cleaning. Take your time, moving at a slow pace to ensure the foam doesn’t run off before it has a chance to act.
In the case of composite decking or similar materials, it’s wise to test a small area first. Some surfaces can be sensitive to certain chemicals. A light application followed by a thorough rinse will prevent damage while still providing a clean finish.
For outdoor furniture, focus on the joints and crevices where dirt accumulates. A consistent application with a bit more pressure can help dislodge stubborn stains. Rinse thoroughly to remove any soap residue, which can attract dirt if left behind.
Each surface has its own quirks. Adjusting your technique based on the material ensures a thorough clean without causing damage. Remember, patience pays off; allow the solution to do its work before rinsing for the best results.
Maintaining Your Foam Lance After Use
After every session, ensure to flush the lance thoroughly. Fill a bucket with clean water and connect the lance back to your washer, then run it until all soap residues are expelled. This prevents blockages and keeps the nozzle clear for future use.
Inspect the seals and O-rings for any wear or damage. I recall a time when I neglected this step, leading to leaks that could have been easily avoided. If you notice any signs of wear, replace them promptly to maintain performance.
After cleaning, disassemble the lance as per the manufacturer’s instructions. This allows you to clean each part effectively, particularly the nozzle, which can accumulate soap and dirt. A soft brush can help remove stubborn residues without scratching the surfaces.
Store the lance in a dry, sheltered location to avoid exposure to extreme temperatures or moisture. I learned the hard way that leaving equipment outside can lead to premature degradation. A simple storage solution can prolong its lifespan significantly.
Lastly, consider applying a light lubricant to the threads and seals before storage. This helps maintain a good seal and ensures smooth operation when you next need it. I’ve found this small step makes a big difference in overall maintenance.

.jpg)


