


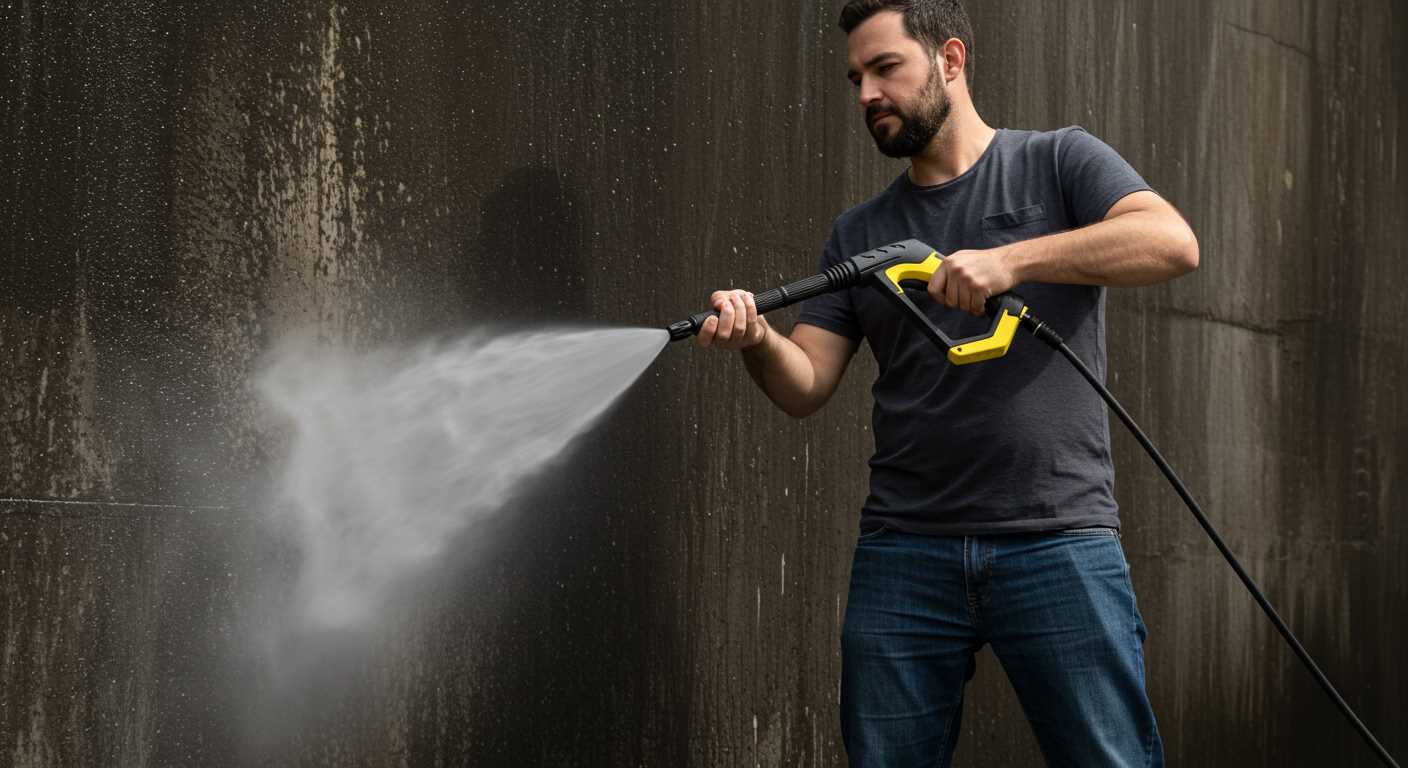
Before anything else, adjust the nozzle to the desired spray pattern. A narrow stream is perfect for stubborn dirt, while a wider fan is ideal for rinsing off soapy residue. Trust me, choosing the right setting makes a significant difference in your cleaning efforts.
I’ve spent years testing various models, and one crucial aspect I’ve learned is the importance of maintaining the equipment. Regularly check for clogs in the nozzle and hoses. A quick rinse with clean water after each use will prevent debris build-up. This simple step saves time and extends the life of your device.

Don’t forget about the detergent. Using the right cleaning solution enhances the results. For example, a dedicated cleaner for patios or driveways can break down grime far better than plain water. Just remember to follow the manufacturer’s guidelines for mixing and application.
Lastly, always wear protective gear. Safety glasses and gloves should be your go-to when working with these machines. I once underestimated the power of the spray and ended up with a nasty bruise. A little precaution goes a long way in ensuring a smooth cleaning experience.
Using a High-Pressure Cleaner Effectively
Begin with a thorough check of all components. Ensure the hose and connections are secure, and that the nozzle is the correct type for your task. I once overlooked this step, leading to a messy situation when the hose disconnected mid-cleaning. It’s a simple check that can save a lot of frustration.
Adjust the detergent settings if your model has that option. When tackling tough grime, I mix the solution according to the manufacturer’s guidelines for optimal results. Always test a small area first to see how the cleaner reacts with the surface. I learned this the hard way after a strong solution damaged some patio tiles; a quick test can prevent that headache.
Maintain a consistent distance from the surface being cleaned. A good rule of thumb is about 30-60 cm. Too close, and you risk damage; too far, and you won’t achieve the desired effect. I’ve found that moving too close to wooden surfaces can strip paint or splinter the wood, so keep that in mind.
Utilise sweeping motions rather than direct blasts. This method ensures even coverage and prevents streaks. I remember the first time I tried a straight-on approach on my driveway; the uneven results were frustrating. A gentle sweeping action, overlapping each pass slightly, yields much better outcomes.
After completing the task, thoroughly rinse the equipment and disconnect the hoses. Leaving detergent in the system can lead to blockages. I’ve made it a habit to run clean water through the system for a minute after use; it prolongs the life of the unit and keeps it running smoothly.
Lastly, store everything properly. I learned the hard way that leaving hoses coiled tightly can cause kinks that are hard to remove. Hang the hose loosely to maintain its integrity. Keeping the equipment in a dry, sheltered spot also helps avoid rust and other damage.
Choosing the Right Nozzle for Your Task
Selecting the suitable nozzle is fundamental for achieving optimal results. For gentle cleaning, like washing cars or patios, opt for a wider spray pattern, typically 25 to 40 degrees. This ensures a safe yet effective clean without damaging surfaces.
For tougher grime or stains, a narrower nozzle, around 15 degrees, delivers a concentrated stream that blasts away dirt. I recall tackling a particularly stubborn oil stain on my driveway; the 15-degree nozzle cut through the mess like a hot knife through butter.
Always consider the material of the surface being cleaned. Delicate surfaces, such as wood or painted surfaces, require a low-pressure nozzle to avoid damage. I once made the mistake of using a high-pressure jet on a wooden deck, resulting in splintering that took ages to repair.
For tasks like cleaning gutters or reaching high spots, a turbo nozzle can be invaluable. It combines the benefits of both narrow and wide nozzles, rotating the stream to cover more area while still providing power. I found this particularly useful when cleaning my roof; it reached spots I couldn’t access easily.
Lastly, remember that nozzle size can affect your machine’s performance. A smaller nozzle increases pressure but can reduce water flow, while a larger one may decrease pressure but allow for more water to cover a broader area. Always match the nozzle to your specific cleaning needs for the best experience.
Connecting the Washer to Water Supply
Begin by ensuring that the inlet hose is securely attached to the water source. You want to avoid any leaks that could interrupt the flow. Use a suitable connector if necessary; many models come with a standard fitting that should match your tap. If you’re working with a garden hose, check that it’s free of kinks and blockages.
Next, turn on the water supply gradually. This helps to eliminate any air pockets in the hose. A steady flow is crucial for optimal performance. Once the water is running, inspect all connections for leaks. If you notice any, tighten the fittings or replace washers as needed.
For those using a water tank or barrel, ensure that the water level is adequate and the outlet is positioned correctly. A filter may be beneficial to prevent debris from entering the unit, which can lead to clogs or damage.
Finally, check the pressure settings before starting. Some units have built-in pressure gauges that can help you monitor the water flow. This step is vital for maintaining the longevity of the machine and achieving the desired cleaning results.
Setting Up the Power Source Safely
Before getting started, ensure the electrical supply is suitable for your equipment. Use a dedicated circuit to prevent overloads. I recall a time when I connected my device to a shared outlet, leading to frustrating power interruptions. Always opt for a separate circuit to avoid such issues.
- Check the voltage rating of your machine. Most models operate on 220-240V. Verify your power source matches this requirement.
- Inspect the power cord for any signs of damage. Frayed wires can lead to dangerous situations. Replace the cord if you notice any wear.
- Utilise a residual current device (RCD) for additional safety. It protects against electrical faults and can save lives.
When connecting to the outlet, avoid using extension leads unless absolutely necessary. If you must, ensure they are rated for outdoor use and can handle the load of your equipment. I once had an extension cord that couldn’t manage the power demand, leading to overheating.
- Plug your device directly into the wall socket whenever possible.
- If using an extension cord, ensure it’s heavy-duty and in good condition.
- Keep all cables away from water sources to prevent any electrical hazards.
Once everything is connected, before starting the machine, double-check all connections. I’ve learned the hard way that a loose plug can cause unexpected shutdowns or worse. After ensuring everything is secure, you’re ready to activate the unit safely.
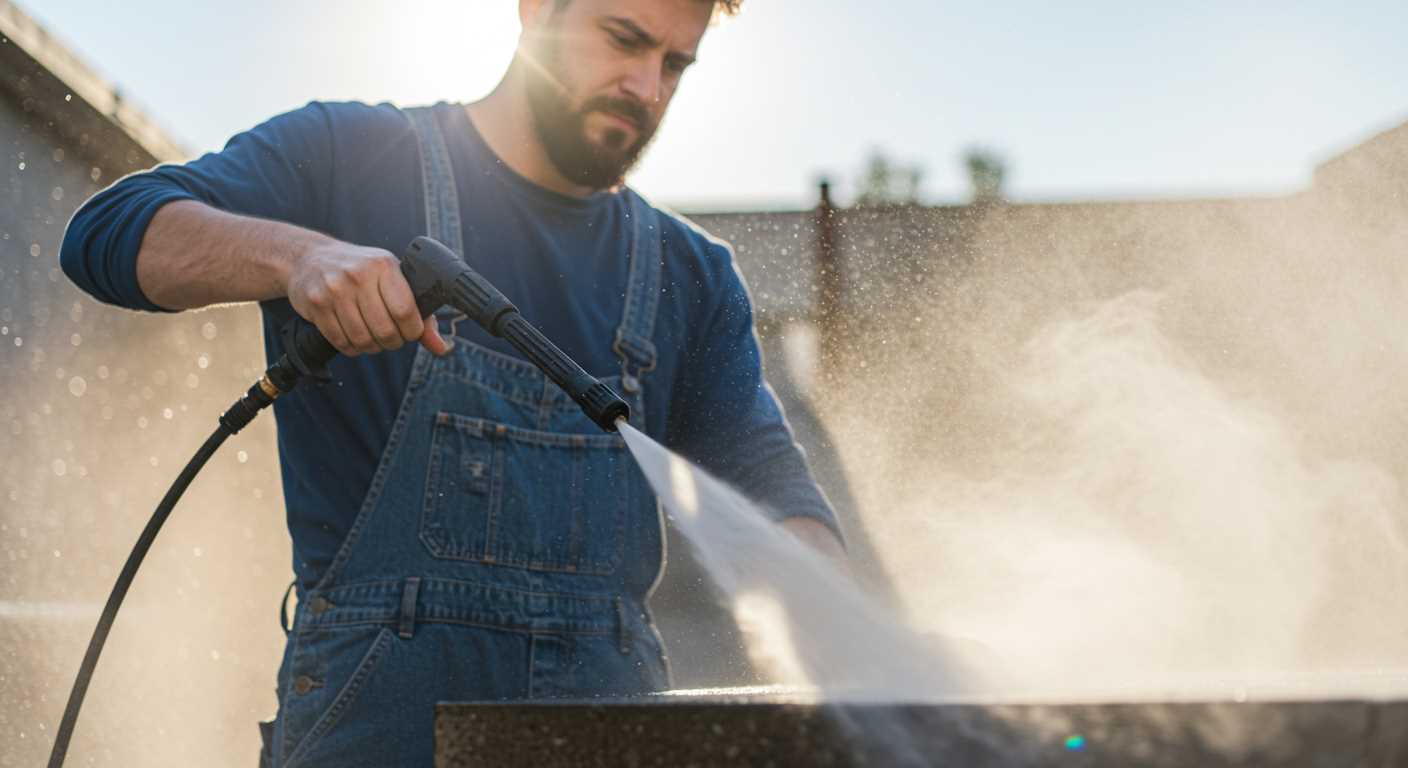
Adjusting Pressure Settings for Different Surfaces
For optimal cleaning results, adjusting the force of the stream based on the surface type is crucial. Hard surfaces like concrete can withstand high pressure, while delicate materials such as wood or painted surfaces require a gentler touch.
Recommended Pressure Levels
| Surface Type | Recommended Pressure (PSI) |
|---|---|
| Concrete | 2500 – 3000 |
| Brick | 2000 – 2500 |
| Wood (Decking) | 1500 – 2000 |
| Vehicles | 1200 – 1900 |
| Painted Surfaces | 1300 – 1600 |
I’ve seen too many people assume that more pressure equals better cleaning. One time, a friend of mine used an excessively powerful stream on his wooden deck, resulting in visible damage. It’s vital to test on a small area first. If you’re unsure, start with the lowest setting and gradually increase until you find the right balance.
Adjusting the Settings
Most models allow for quick adjustments. Turn the knob or dial to suit your task, but always keep the nozzle at a distance of at least two feet from the surface. This distance helps prevent damage while still providing effective cleaning. For stubborn dirt or grime, you can get closer, but always proceed with caution.
If you notice a drop in performance, it might be time to check the equipment. Issues such as low pressure could point to a need for maintenance. If you’re handy, you might want to look into repairing the pump yourself in the pressure washer. Alternatively, if you’re looking for tools to aid in your cleaning tasks, consider investing in the best air compressor for continuous use. This can complement your cleaning arsenal effectively.
Always remember that the goal is to clean efficiently while preserving the integrity of the surface. Adjusting the pressure settings is a simple yet effective way to achieve this.
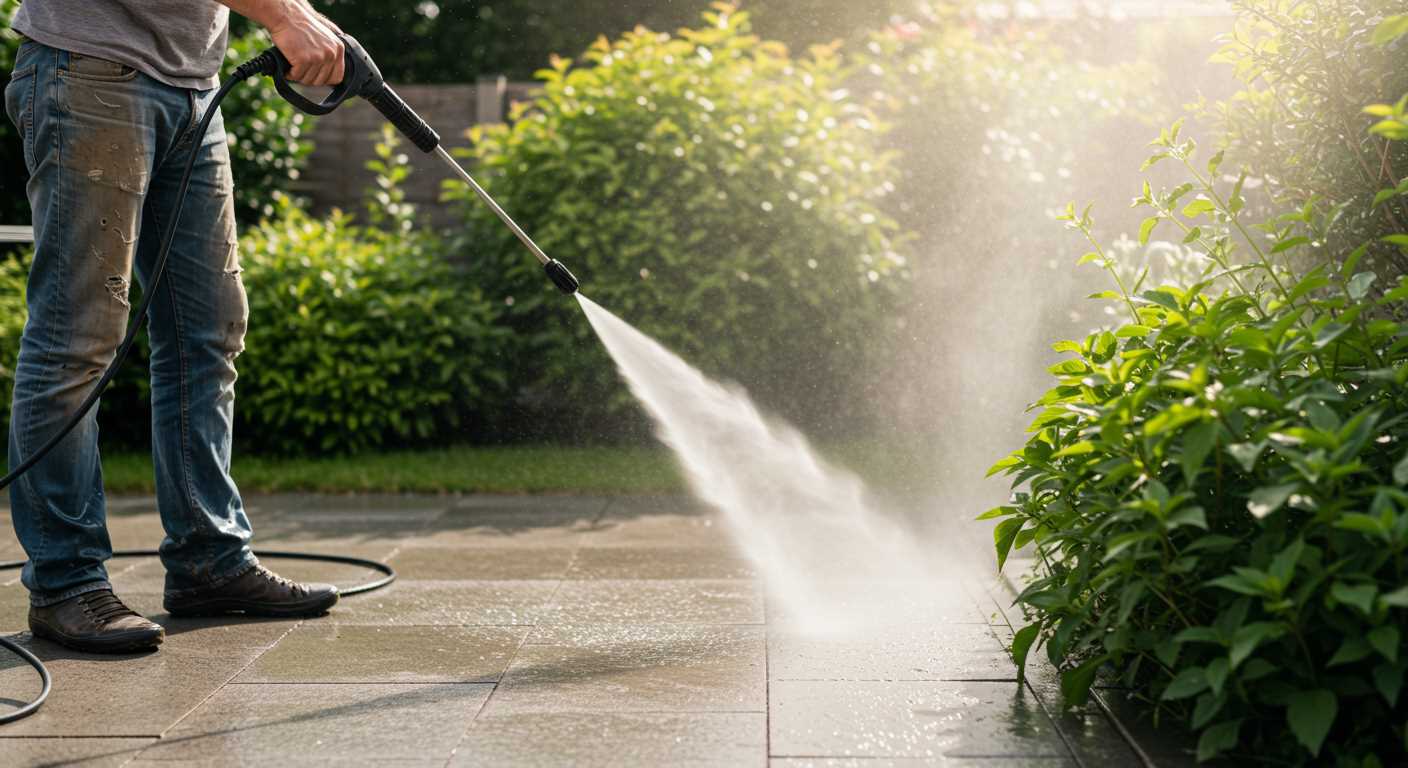
Proper Techniques for Cleaning Driveways and Patios
For optimal results, always start at the highest point of the area you’re tackling, working your way down. This prevents dirty water from running over cleaned sections. I recall a time when I overlooked this detail while cleaning my own driveway–what a mess that created!
Maintain a consistent distance of about 30 cm from the surface. Getting too close can cause damage, especially on softer materials. I remember a friend who accidentally gouged his patio because he was too enthusiastic with the nozzle. A steady hand is key.
Use a sweeping motion, overlapping each pass slightly to ensure even cleaning. If you concentrate too long on one spot, you risk creating streaks or uneven patches. I’ve found that treating it like painting–long, even strokes–yields the best results.
For stubborn stains, like oil or grease, pre-treatment is advisable. Apply a suitable cleaner before power washing. This can save time and effort. I’ve seen driveway stains lift almost effortlessly when treated ahead of time.
Be mindful of the direction of the water flow. Always direct the spray away from any doors or openings to prevent water from entering your home. I once made the mistake of spraying towards my garage, which led to a minor indoor flood–an experience I won’t forget!
Lastly, after finishing, rinse the surfaces thoroughly. This removes any residue from cleaning agents and gives everything a polished look. I’ve learned that a final rinse can make all the difference in the shine of a patio or driveway.
Using Detergents with Your Pressure Cleaner
Start with a dedicated detergent designed for high-pressure applications. These formulations effectively break down tough grime without damaging surfaces. Always check compatibility with your machine’s specifications before selection.
Follow these steps for optimal results:
- Fill the detergent tank with the chosen cleaning solution. Ensure it’s diluted according to the manufacturer’s instructions.
- Attach the correct nozzle, typically a low-pressure one, to allow for proper detergent application.
- Begin spraying at the bottom of the surface and work your way up. This technique prevents streaks and ensures even coverage.
- Allow the detergent to sit for the recommended time, usually around 5 to 10 minutes, to penetrate the dirt.
- Switch to a high-pressure nozzle and rinse thoroughly from top to bottom, ensuring all residue is removed.
When cleaning vehicles, opt for a gentle car shampoo to avoid damaging the paint. Always rinse thoroughly to prevent soap residue.
For heavily soiled areas, such as oil-stained driveways, consider a degreaser. Apply it before rinsing for better results.
- Test any detergent on a small area first to ensure it won’t harm the surface.
- Store leftover detergent in a cool, dry place, away from direct sunlight.
- Regularly clean the detergent tank to prevent clogs and maintain performance.
Mixing different cleaning agents can lead to ineffective results or even damage. Stick to one type of detergent per session for the best outcome.
Maintaining Your Pressure Washer After Use
After every session with your cleaning equipment, dedicate time to proper upkeep. First, disconnect the water supply and drain any remaining fluid from the unit. This step prevents internal corrosion and ensures longevity. I once neglected this with an older model, and the result was a costly repair. Avoid my mistake.
Cleaning and Storing Accessories
Rinse the nozzles and any attachments thoroughly to remove dirt and debris. A clogged nozzle can restrict water flow and reduce performance. I recommend using a small brush or a toothpick for stubborn blockages. After cleaning, store these components in a designated spot to prevent loss.
Routine Inspections
Regularly check the hoses and connections for wear or leaks. A small crack can lead to significant pressure loss. I’ve found that a quick visual inspection after each use saves time and money in the long run. Lastly, ensure that the unit itself is stored in a dry, protected area to prevent damage from the elements.
Troubleshooting Common Issues with Your Pressure Cleaner

If your cleaning machine isn’t performing as expected, start by checking the water supply. Ensure the inlet hose is securely connected and free from kinks. A consistent water flow is crucial; if you’re experiencing interruptions, it could lead to low pressure or uneven spray.
Low Pressure Problems
Low pressure often stems from clogged nozzles. Remove the nozzle and inspect it for debris. A simple flush with water usually resolves this. If problems persist, consider checking the filter located at the water inlet. A blocked filter can drastically reduce performance.
Unusual Noises or Vibrations
Should you hear strange sounds or notice excessive vibrations, this may indicate an issue with the pump or motor. First, check for loose components. Tighten any bolts and ensure all connections are secure. If the problem continues, it might be time to consult the manual or seek professional assistance.
Regular maintenance is key to preventing these issues. After every use, clear out any debris and store the unit in a dry place to avoid moisture-related problems. Remember, taking a few moments for upkeep can save significant hassle in the long run.
.jpg)


